• Skip to primary navigation
  • Skip to main content
  • Skip to primary sidebar
The Virtuous Home logo
  • About
    • About
    • Privacy Policy and Disclosure
    • Contact
  • Homemaking
    • Homemaking Lifestyle
    • Handmade
  • Sourdough
  • Fresh Milled Flour
  • Recipes
  • Resources
    • The Homemaker’s Library
    • Shop
    • Amazon Favorites
    • Free Resource Library
    • Healthy Living
      • Pro Metabolic
  • Home

Posts

Easter Gift Guide: Simple Easter Gift Ideas for the Whole Family

Mar 10, 2026 · Leave a Comment

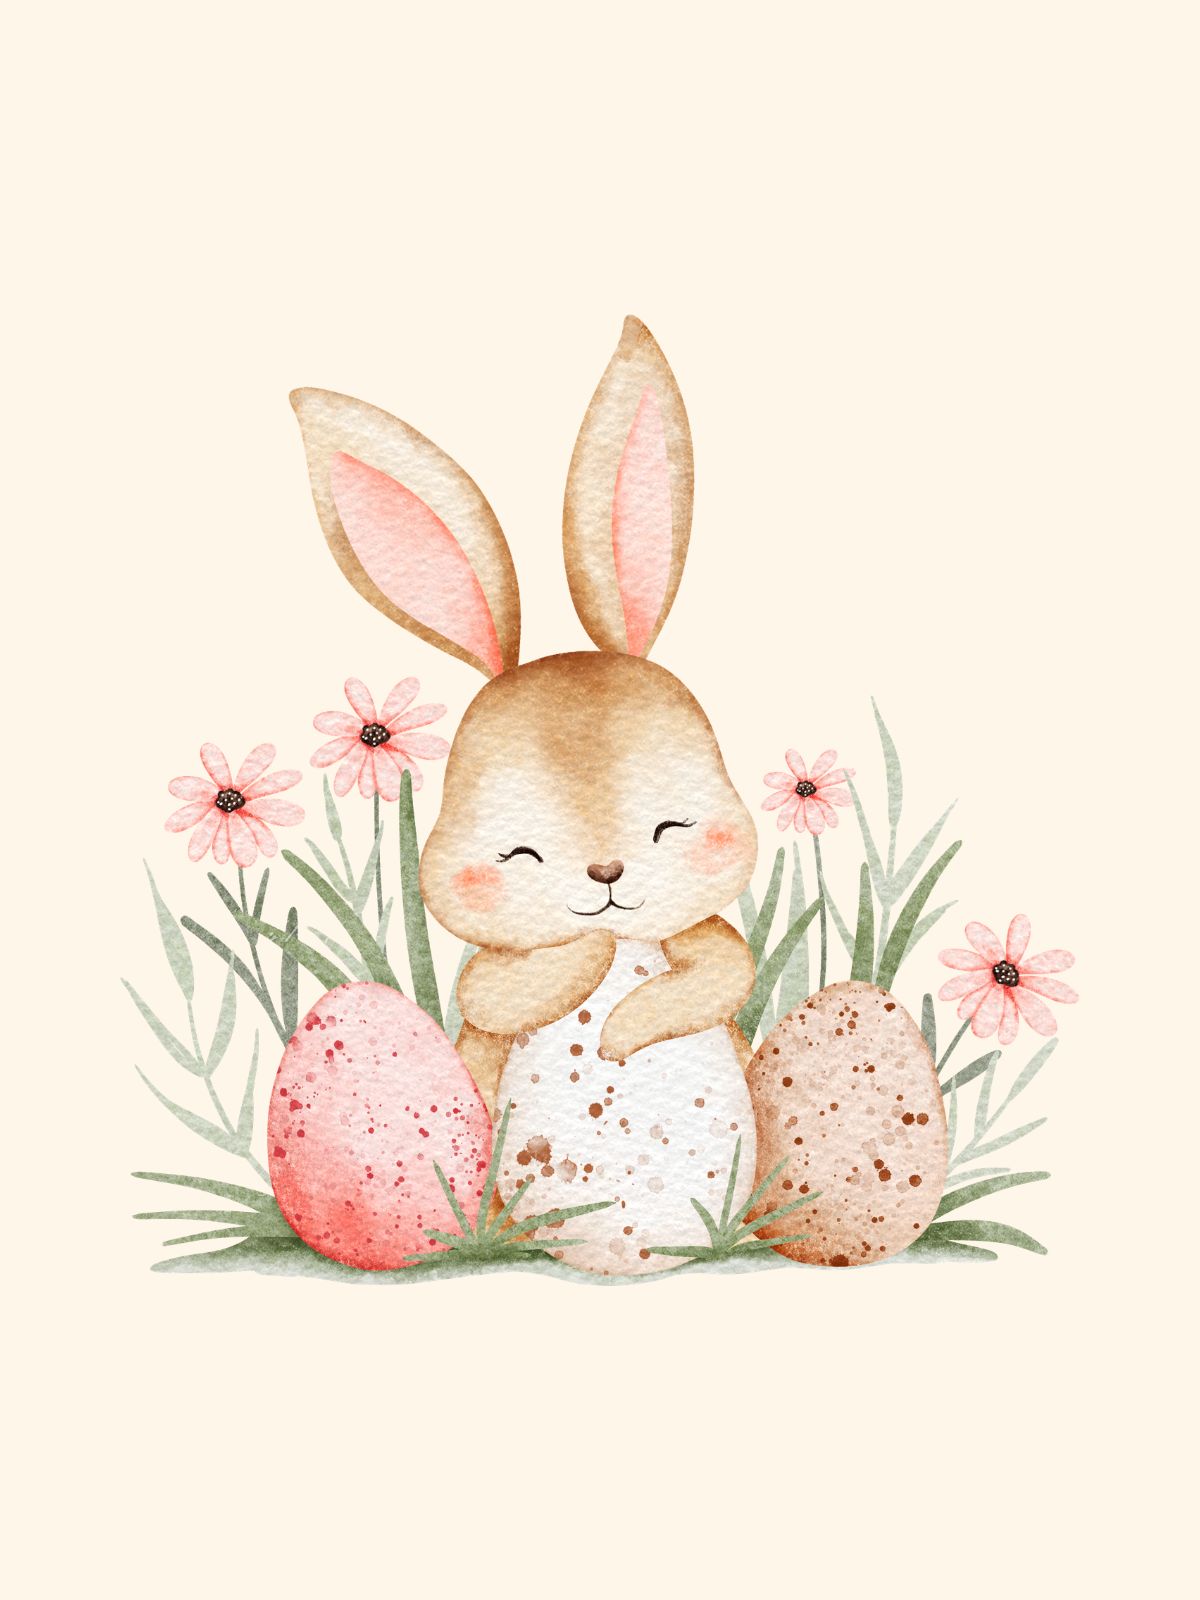
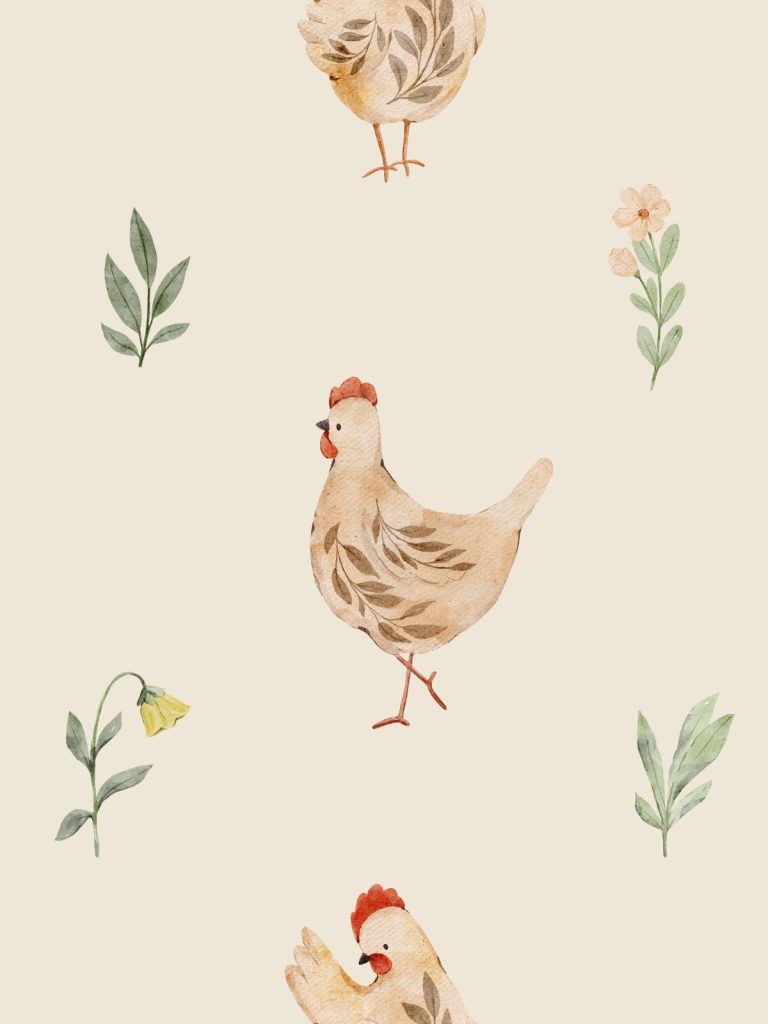
Easter is a beautiful opportunity to celebrate new life, renewal, and the hope of the resurrection. While chocolate bunnies and jelly beans have their place, many families are looking for more meaningful Easter gift ideas that reflect the heart of the season.

If you want to create thoughtful Easter baskets without clutter or excess, this Easter gift guide will help you choose simple, purposeful items your family will truly enjoy. Whether you are shopping for babies, children, teens, or even creating a special basket for your husband, these Easter basket ideas are practical, faith-centered, and timeless.

As an Amazon Associate, I earn from qualifying purchases. This means if you click on one of my affiliate links and make a purchase, I may receive a small commission at no additional cost to you. I only recommend products that I personally use, love, or believe will be helpful to my readers.

Meaningful Easter Basket Ideas for Children

When building an Easter basket for children, consider including items that are both joyful and useful. A few intentional gifts often feel more special than a basket overflowing with candy.

Faith-Based Books
A beautifully illustrated children’s Bible storybook or a simple book about the resurrection helps center Easter on its true meaning. Choose age-appropriate versions that can become part of your family’s yearly tradition.

Spring-Themed Books
Picture books about…

  • spring
  • baby animals
  • gardening

…or new beginnings fit naturally into the season and can be enjoyed long after Easter Sunday.

Art Supplies

  • New crayons
  • watercolor paints
  • coloring books
  • a sketch pad

These are practical gifts that support your daily rhythm at home.

Outdoor Toys

  • bubbles
  • sidewalk chalk
  • jump ropes
  • a small ball

These simple gifts celebrate the arrival of spring and invite children outside as the weather warms.
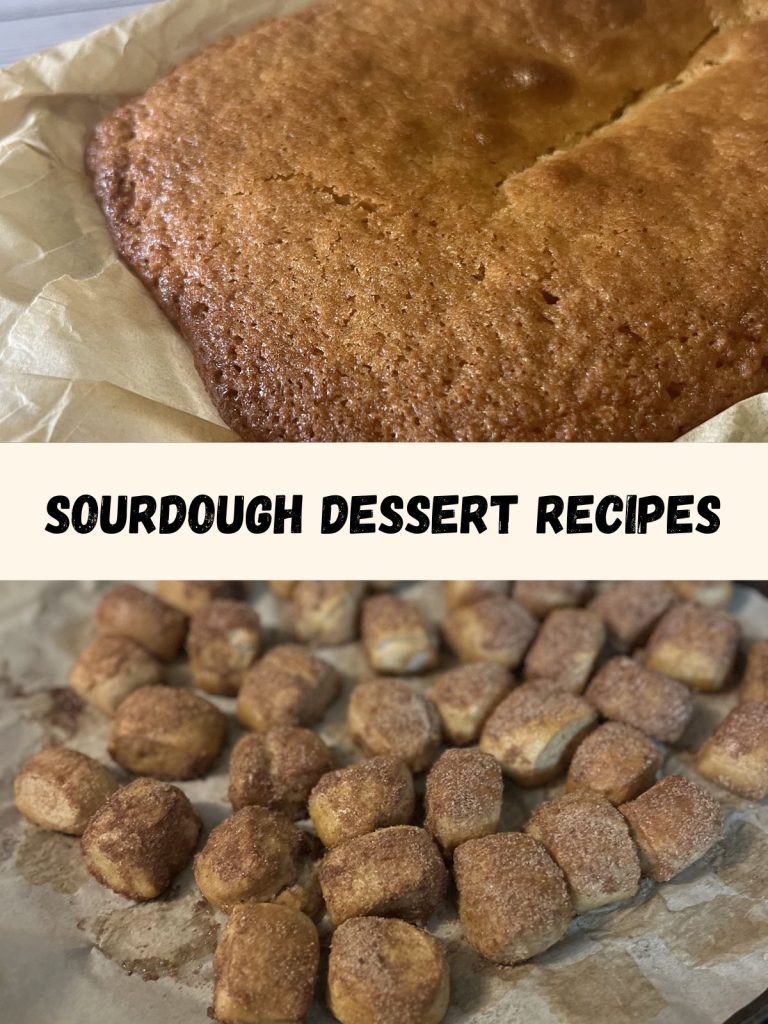
Handmade Treats
Instead of excessive packaged candy, consider…

  • homemade cookies
  • muffins
  • homemade chocolate

A few quality sweets feel special without overwhelming little bodies.

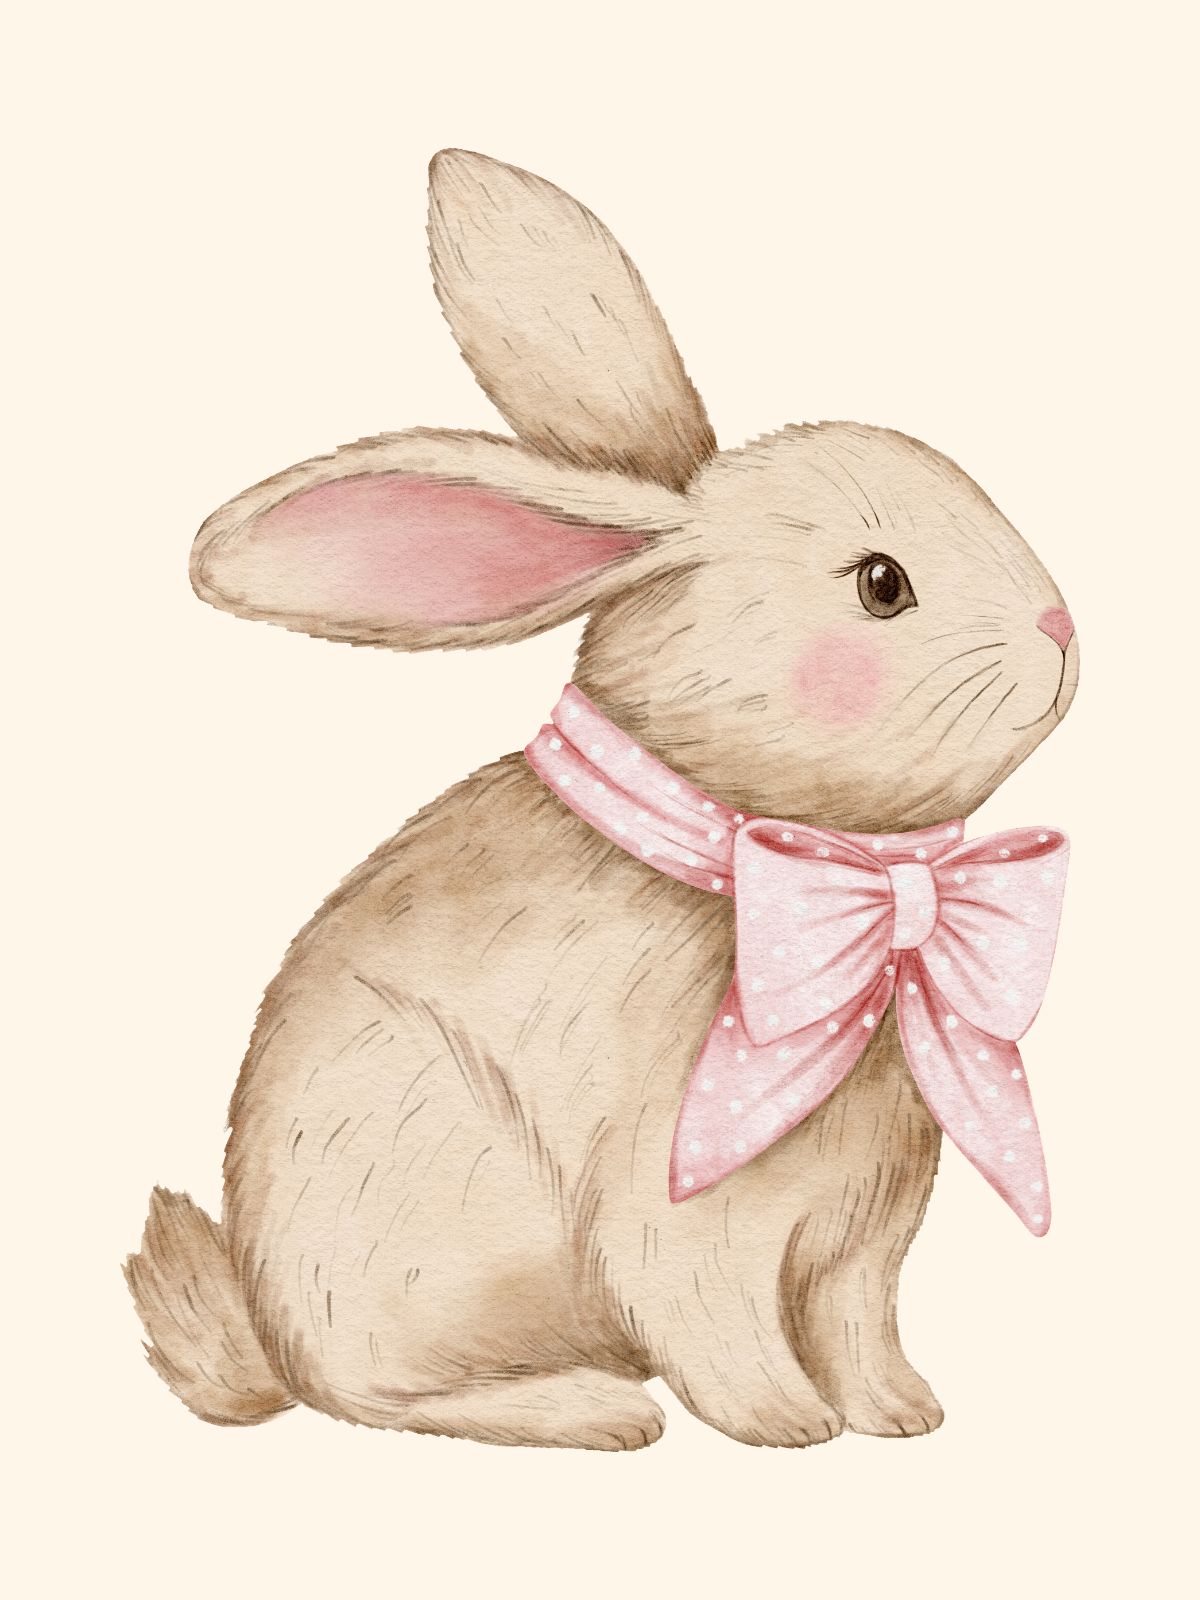
Easter Gift Ideas for Babies and Toddlers

For little ones, Easter baskets can remain beautifully simple.

Board Books
Sturdy board books about springtime or Bible stories make sweet keepsakes.

Soft Toys
A small stuffed lamb or bunny can become a cherished comfort item.

Teething Toys or Practical Items

  • Pacifier clips – Girls or boys
  • baby spoons
  • a lightweight spring outfit like this cute dress or this adorable bow tie and suspenders outfit

…can all fit into a basket while still being useful. At this age, the joy is in the experience, not the quantity.

Easter Gift Ideas for Teens

Teen Easter baskets can feel tricky, but thoughtful simplicity works here too.

Devotionals or Journals
A devotional book or a beautiful journal encourages reflection and growth.

Quality Chocolate
A favorite gourmet chocolate bar or homemade treat feels intentional.

Gift Cards with a Personal Note
A small gift card to a favorite coffee shop or bookstore paired with a handwritten note makes it meaningful rather than transactional.

Spring Accessories
A new book, a lightweight scarf, or a practical accessory they have been needing fits nicely into a basket.

Easter Gift Ideas for Your Husband

Easter gifts are not just for children. A small, thoughtful gift can make the day feel special for your husband as well.

Favorite Snacks
Include his favorite treats or a special breakfast item.

A New Book
A theology book, devotional, or hobby-related book can be a thoughtful surprise.

Practical Items
A new pair of work gloves, grilling tools, or coffee beans he loves are simple but meaningful.

A Handwritten Letter
Never underestimate the power of a sincere note expressing gratitude and love.

How to Create a Simple and Beautiful Easter Basket

Choose a Reusable Basket
A woven basket, wooden crate, or fabric bin can be used year after year.

Keep It Minimal
Three to five thoughtful items are more than enough.

Add Natural Elements
Tuck in greenery, ribbon, or a linen napkin instead of plastic filler.

Focus on Meaning
Let at least one item in each basket point back to the true message of Easter.

Frugal Easter Gift Tips

If you are working within a budget, remember that Easter does not require extravagance.

  • Shop your home first and set aside small items over several weeks.
  • Choose one special item and keep the rest simple.
  • Bake something homemade instead of buying large quantities of candy.
  • Reuse baskets from previous years.

Children remember traditions far more than they remember how full the basket was.

Final Thoughts on Creating a Meaningful Easter Gift

An Easter gift guide should not add pressure to your season. Instead, let it inspire you to slow down and choose intentionally.

Easter baskets can reflect beauty, restraint, and purpose. They can celebrate spring, encourage growth, and gently point your family toward the hope at the center of this holy day.

When you approach Easter with simplicity and intention, even the smallest basket can feel abundant.

Save it for later…

Homemaking, Homemaking Lifestyle

Sourdough Focaccia Bread Recipe

Mar 4, 2026 · Leave a Comment

Sourdough focaccia bread is one of the simplest and most rewarding ways to bake with a sourdough starter. With its golden, olive oil–crisped edges and soft, airy interior, this rustic Italian bread is both beautiful and incredibly delicious. Whether you are new to sourdough or looking for a low-effort recipe with impressive results, focaccia is a perfect place to begin.

This sourdough focaccia recipe combines slow fermentation with generous olive oil to create deep flavor and tender texture. The long rise develops natural tang while keeping the crumb light and fluffy. Topped with salt and fresh herbs, it’s the kind of bread that disappears quickly from the table.

Best of all, focaccia is wonderfully versatile. Serve it alongside soup, slice it for sandwiches, or enjoy it warm straight from the pan dipped in olive oil and balsamic vinegar. Once you make it from scratch, it may just become a staple in your kitchen.

Yield: 1 flat bread loaf

Sourdough Focaccia Bread Recipe

Sourdough Focaccia Bread Recipe

Sourdough focaccia bread is one of the simplest and most rewarding ways to bake with a sourdough starter. With its golden, olive oil–crisped edges and soft, airy interior, this rustic Italian bread is both beautiful and incredibly delicious. Whether you are new to sourdough or looking for a low-effort recipe with impressive results, focaccia is a perfect place to begin.

Ingredients

  • 4 1/3c Flour - 500g hard white wheat
  • 1/3c - 300g water
  • 1t - 6g salt
  • 1/3c - 100g sourdough starter

Instructions

    Attach the dough hook to your stand mixer. In the bowl, combine sourdough starter, water, flour, and salt. Mix on low speed for 15-20 minutes until you can stretch a piece of dough enough to see light through without it breaking.

    Cover. with plastic wrap or a wet towel and let it rise at room temperature for 6–8 hours, You can place it in the oven with light on to recreate a warm environment during the cooler months.

    Generously coat a 9x13-inch casserole dish with olive oil or line with wet parchment paper to help it flex and fit in the dish better. Turn the dough out into the dish. Carefully stretch it slightly toward the edges. You don't need to fill the pan.

    Cover the pan and allow the dough to rise for 1–3 hours, until it spreads fully to the edges and becomes noticeably puffy. For deeper flavor, you may refrigerate the dough overnight at this stage and bring it back to room temperature before baking.

    Preheat the oven to 425°F. Drizzle olive oil over the top of the dough. Using your fingertips, press deeply into the dough to create dimples across the surface. Sprinkle with salt and add toppings such as rosemary, parsley, garlic, cherry tomatoes, or olives.

    Bake for 20–25 minutes, or until the focaccia is golden brown with crisp edges. The top should be lightly browned and the bottom firm and golden.

    Cool on a wire rack for at least 15 minutes before slicing. Serve alongside soups, salads, or as a sandwich bread.

Did you make this recipe?

Please leave a comment on the blog or share a photo on Pinterest

© Naomi Scott

Equipment:

  • Stand mixer
  • Grain Mill
  • Spatula
  • Measuring cups and spoons – Copper, anyone?!
  • Parchment paper
  • Casserole Dish
  • Wire rack

Ingredients:

  • 4 1/3c Flour – 500g hard white wheat
  • 1/3c – 300g water
  • 1t – 6g salt
  • 1/3c – 100g Sourdough Starter

Instructions:

With a stand mixer:

Mix the Dough
Attach the dough hook to your stand mixer. In the bowl, combine active sourdough starter, warm water, and olive oil. Add the flour and salt, then mix on low speed for 15-20 minutes until you can stretch a piece of dough enough to see light through without it breaking.

Without a stand mixer:

Mix the Dough
In a large bowl, combine sourdough starter, water, and olive oil. Add flour and salt, then mix until a shaggy dough forms and no dry flour remains. Cover the bowl and let the dough rest for 20–30 minutes to absorb some of the water.

Stretch and Folds
Over the next 1–2 hours, perform a series of stretch and folds every 30 minutes or so. To do this, grab one side of the dough, stretch it upward, and fold it over itself. Rotate the bowl and repeat 3–4 times per session.

Bulk Fermentation
Cover. with plastic wrap or a wet towel and let it rise at room temperature for 6–8 hours, You can place it in the oven with light on to recreate a warm environment during the cooler months.
Prepare the Pan
Generously coat a 9×13-inch baking pan with olive oil. Turn the dough out into the pan. Carefully stretch it slightly toward the edges. You don’t need to fill the pan.
Second Rise
Cover the pan and allow the dough to rise for 1–3 hours, until it spreads fully to the edges and becomes noticeably puffy. For deeper flavor, you may refrigerate the dough overnight at this stage and bring it back to room temperature before baking.
Dimple and Top
Preheat the oven to 425°F. Drizzle olive oil over the top of the dough. Using your fingertips, press deeply into the dough to create dimples across the surface. Sprinkle with salt and add toppings such as rosemary, garlic, cherry tomatoes, or olives.
Bake
Bake for 20–25 minutes, or until the focaccia is golden brown with crisp edges. The top should be lightly browned and the bottom firm and golden.
Cool and Serve
Remove the focaccia from the pan and cool on a wire rack for at least 15 minutes before slicing. Serve alongside soups, salads, or as a sandwich bread.

Recipes, Sourdough

How to Sew a Curtain

Mar 4, 2026 · Leave a Comment

Learning how to sew a curtain is one of the most practical and rewarding homemaking skills you can develop. Custom curtains instantly add warmth, softness, and personality to a room without the high cost of store-bought panels. When you sew your own, you control the fabric, length, and overall look to perfectly fit your home.

This beginner-friendly tutorial will walk you through exactly how to sew a simple rod pocket curtain. The process is straightforward, requires minimal supplies, and is ideal for those new to sewing. With careful measuring and a few clean seams, you can create beautiful curtains that look polished and professional.

Before you begin, choose a fabric that complements your space and works well for curtains. Cotton and linen blends are all excellent options for a structured but soft drape. Once you have your fabric and sewing machine ready, you can begin the measuring process.

Prewash Your Fabric

Before you ever measure or cut your fabric, take the time to prewash it. This simple step helps prevent shrinking after your curtains are sewn and hung. Natural fibers like cotton and linen are especially prone to shrinking, so washing first ensures your finished length stays accurate. It also removes any stiffness or chemical residue from manufacturing.

Wash and dry your fabric the same way you plan to care for your curtains in the future. If you intend to machine wash and tumble dry them, do that now before sewing. Once dry, give the fabric a good press if it needs it with a hot iron to smooth out wrinkles and make measuring easier.

If you take it out of the dryer right when it’s done and fold it, you can skip the ironing.

Measure Your Window and Fabric

Start by measuring the height of your window area from the top of the curtain rod to where you want the curtain to fall. Add four inches to that measurement to account for seam allowances and hems.

Next, measure the width of your window area. Add one inch to the width to allow for seam allowance on both sides. Accurate measurements are essential to achieving a curtain that hangs properly and looks balanced.

Once you have your measurements, measure your fabric carefully and cut it to size. Double check your numbers before cutting to avoid mistakes. Precision at this stage makes the rest of the sewing process much smoother.

Hem the Sides

Begin sewing by finishing the sides of your curtain panel. Fold over one long edge of the fabric about one quarter inch, then fold it over again another quarter inch to create a clean double fold. This technique hides raw edges and prevents fraying.

You can pin it or fold it over as you go. Don’t forget to backstitch! Sew straight down the folded edge and backstitch at the end.

Repeat on the other side of the fabric.

Create the Rod Pocket

To create the rod pocket, start with the top edge of the fabric. Fold the top down one quarter inch and sew straight across to secure the raw edge. This initial seam creates a clean finish and strengthens the top of the curtain.

Next, fold the top down again one and a half inches. Sew straight across, stitching directly over your previous seam line. This creates a pocket wide enough for most standard curtain rods.

Test the Length and Trim

After sewing the rod pocket, hang the curtain on the rod to test the length. See where it falls and determine if any adjustments are needed. This step ensures your curtain will hang exactly where you envisioned.

If the curtain is too long, trim any excess fabric from the bottom. Be sure to account for a half inch seam allowance before cutting. Take the curtain back down once you are satisfied with the length.

Hem the Bottom

To hem the bottom edge, fold the fabric over one quarter inch and then fold it over another quarter inch to enclose the raw edge. This double fold creates a clean, durable hem that prevents fraying over time.

Sew straight across the folded edge.

Once the hem is complete, rehang the curtain on the rod. Step back and admire your handiwork. Your finished curtain should hang beautifully, adding charm and softness to your space.

Final Thoughts

Sewing your own curtain is a simple yet impactful homemaking project. With careful measuring, clean seams, and attention to detail, you can create custom window treatments tailored to your home. The process is approachable for beginners and satisfying for experienced sewists alike.

Homemade curtains add character and warmth that store-bought options often lack. They reflect the care and intention you put into your living space. Each time you glance at your window, you will see the result of your craftsmanship.

By following these straightforward steps, you can confidently sew curtains for any room in your home. With practice, this skill becomes quicker and even more enjoyable. Rehang your finished curtain, step back, and enjoy the peaceful beauty you created with your own hands.

Handmade

How to Enjoy Winter Homemaking: A Stay-at-Home Mom’s Guide

Mar 4, 2026 · Leave a Comment

Winter can feel long and heavy, especially for stay-at-home moms managing household chores, meals, and the rhythm of family life. Shorter days, cold weather, and cozying up indoors can make the season feel overwhelming, but winter also offers a unique opportunity to slow down, cultivate comfort, and embrace homemaking in a deliberate, joyful way.

With a few practical strategies and a mindful mindset, you can turn the challenges of winter into moments of warmth, productivity, and fulfillment.

Embrace the Cozy Atmosphere

Winter is the perfect time to focus on comfort and atmosphere in your home. Soft blankets, warm lighting, and seasonal scents create a welcoming environment that encourages relaxation and presence.

Lighting candles, simmering a pot of cinnamon and cloves, or brewing hot tea not only enhance the mood but also transform ordinary household routines into moments of delight. Embracing the season’s cozy elements can make daily homemaking tasks feel more comforting and less like chores.

Establish Gentle Routines

Routines provide structure, but in winter, it’s helpful to make them gentle and flexible. Adjust your daily schedule to account for shorter daylight hours and lower energy levels. Focus on small, meaningful tasks each day rather than attempting long, exhaustive cleaning sessions.

For example, tidy one room at a time, fold laundry while watching a favorite show, or prep meals in batches to make evenings easier. Gentle routines make homemaking feel manageable, even when the weather encourages slower days.

Find Joy in Seasonal Activities

Incorporating winter-specific activities can make homemaking feel more purposeful and enjoyable. Baking warm breads, making homemade soups, or creating simple crafts for the home are practical ways to fill your household with comfort.

Seasonal projects such as organizing holiday decorations, crafting winter-themed décor, or planting indoor herbs can provide a sense of accomplishment and creativity. By celebrating the season through these small joys, homemaking becomes both productive and emotionally rewarding.

Connect With Your Family

Winter often brings more indoor family time, which can be a chance to strengthen bonds. Involve children in age-appropriate household tasks, like folding laundry, setting the table, or helping with cooking.

Reading together by the fireplace, sharing cozy meals, or playing simple indoor games can create memories while maintaining a smoothly run home. Seeing family members engaged in household routines can make chores feel less like work and more like shared experiences.

Care for Yourself While Homemaking

Your well-being is essential for enjoying winter homemaking. Short breaks for a warm cup of tea, stretching, or a quiet moment can help you recharge. Don’t hesitate to adjust your expectations for housework during the season—slower, more intentional days are perfectly acceptable.

Prioritizing your rest and self-care allows you to approach homemaking with energy and a positive attitude rather than fatigue and frustration.

Make Cleaning and Organization Enjoyable

Even in winter, a clean, organized home contributes to peace and contentment. Turn cleaning into a fun activity: play uplifting music, light a scented candle, or set a timer to make small tasks more enjoyable.

Focus on high-impact areas like kitchen counters, baseboards, and light fixtures, and tackle them in short, manageable sessions. By approaching household tasks with intention rather than obligation, you can enjoy the process instead of feeling burdened by it.

Final Thoughts on Enjoying Winter Homemaking

Winter homemaking doesn’t have to feel tedious or isolating. By embracing the season’s cozy atmosphere, establishing gentle routines, celebrating seasonal activities, connecting with your family, and caring for yourself, you can transform this slower season into a time of comfort, joy, and meaningful work.

The key is to approach your home with care, grace, and an appreciation for small daily victories. With these strategies, winter can become not just a season to endure but an opportunity to savor the rhythm and beauty of home life.

Save it for later…

Homemaking, Homemaking Lifestyle

Sourdough Focaccia with Fresh Milled Flour

Mar 3, 2026 · Leave a Comment

Sourdough focaccia made with fresh milled flour is one of the most flavorful and nourishing breads you can bake at home. The combination of active sourdough starter and freshly ground whole grain creates a rich, slightly nutty flavor with a soft, airy crumb and crisp golden edges. If you love baking from scratch and milling your own flour, this recipe is a beautiful way to bring those traditional skills together.

This sourdough focaccia recipe uses a stand mixer for ease or stretch and folds for convenience, making it simple enough for busy days while still delivering artisan-quality results. Whether served alongside soup, sliced for sandwiches, or dipped in olive oil and balsamic vinegar, this bread is sure to become a favorite in your kitchen.

Sourdough Focaccia with Fresh Mille Flour

Sourdough Focaccia with Fresh Mille Flour

Sourdough focaccia made with fresh milled flour is one of the most flavorful and nourishing breads you can bake at home. The combination of active sourdough starter and freshly ground whole grain creates a rich, slightly nutty flavor with a soft, airy crumb and crisp golden edges.

Ingredients

  • 4 1/3c Flour - 500g hard white wheat
  • 1/3c - 300g water
  • 1t - 6g salt
  • 1/3c - 100g Sourdough Starter

Instructions

    With a stand mixer:

    Mix the Dough
    Attach the dough hook to your stand mixer. In the bowl, combine active sourdough starter, warm water, and olive oil. Add the flour and salt, then mix on low speed until a shaggy dough forms and no dry flour remains.
    Knead the Dough
    Increase the mixer speed to medium-low and knead for 15-20 minutes until you can stretch a piece of dough enough to see light through without it breaking.

    Without a stand mixer:

    Mix the Dough
    In a large bowl, combine sourdough starter, water, and olive oil. Add flour and salt, then mix until a shaggy dough forms and no dry flour remains. Cover the bowl and let the dough rest for 20–30 minutes to hydrate.

    Stretch and Folds
    Over the next 1–2 hours, perform a series of stretch and folds every 30 minutes. To do this, grab one side of the dough, stretch it upward, and fold it over itself. Rotate the bowl and repeat 3–4 times per session until the dough becomes smoother and more elastic.

    Bulk Fermentation
    Cover. with plastic wrap or a wet towel and let it rise at room temperature for 6–8 hours, You can place it in the oven with light on to recreate a warm environment during the cooler months.
    Prepare the Pan
    Generously coat a 9x13-inch baking pan with olive oil. Turn the dough out into the pan. Carefully stretch it slightly toward the edges. You don't need to fill the pan.
    Second Rise
    Cover the pan and allow the dough to rise for 1–3 hours, until it spreads fully to the edges and becomes noticeably puffy. For deeper flavor, you may refrigerate the dough overnight at this stage and bring it back to room temperature before baking.
    Dimple and Top
    Preheat the oven to 425°F. Drizzle olive oil over the top of the dough. Using your fingertips, press deeply into the dough to create dimples across the surface. Sprinkle with salt and add toppings such as rosemary, garlic, cherry tomatoes, or olives.
    Bake
    Bake for 20–25 minutes, or until the focaccia is golden brown with crisp edges. The top should be lightly browned and the bottom firm and golden.
    Cool and Serve
    Remove the focaccia from the pan and cool on a wire rack for at least 15 minutes before slicing. Serve alongside soups, salads, or as a sandwich bread.

Did you make this recipe?

Please leave a comment on the blog or share a photo on Pinterest

© Naomi Scott

Why Use Fresh Milled Flour for Focaccia

Fresh milled flour adds depth of flavor that store-bought flour simply cannot match. Because the bran and germ remain intact, the flour retains natural oils and nutrients that contribute to both taste and texture. The result is focaccia with a wholesome character and a beautiful golden crumb.

When baking with fresh milled flour, you may notice the dough absorbs more water than conventional flour. This is completely normal and helps create the soft interior that makes focaccia so irresistible. Allowing the dough enough time to hydrate and ferment fully is key to achieving the best texture.

For this recipe, hard white wheat works especially well. It provides structure for a good rise while keeping the flavor mild and family-friendly.

Equipment:

  • Stand mixer
  • Grain Mill
  • Spatula
  • Measuring cups and spoons – Copper, anyone?!
  • Parchment paper
  • Casserole Dish
  • Wire rack

Ingredients for Sourdough Focaccia

You will need…

  • sourdough starter – active or discard
  • filtered water
  • hard white wheat berries
  • olive oil
  • salt.

Using high-quality olive oil enhances both flavor and texture. Since focaccia relies heavily on olive oil for its signature crisp edges and tender crumb, do not be shy with it.

Optional Toppings

Classic toppings include flaky sea salt and fresh rosemary. You can also add sliced cherry tomatoes, caramelized onions, minced garlic, or olives for variety.

Instructions:

Mill the Wheat Berries

Weigh out the hard white wheat berries and mill in your grain mill.

How to Make Sourdough Focaccia with Stand Mixer

Mixing the Dough

Attach the dough hook to your stand mixer. In the mixer bowl, combine active sourdough starter, warm water, and olive oil. Add the freshly milled flour and salt, then mix on low speed until a shaggy dough forms and no dry flour remains.

Because fresh milled flour absorbs more moisture, the dough may feel slightly stickier than typical white flour dough. This is normal and will improve as gluten develops.

Kneading

Increase the mixer speed to medium-low and knead for 5 to 8 minutes. The dough should become smooth, elastic, and slightly tacky, pulling away from the sides of the bowl while still clinging lightly to the bottom.

Transfer the dough to a lightly oiled bowl and cover. Allow it to rise at room temperature for 4 to 8 hours, depending on the strength of your starter and the temperature of your kitchen. The dough should appear puffy, airy, and slightly jiggly with visible bubbles.

How to Make Sourdough Focaccia with Stretch and Folds

Mix the Dough
In a large bowl, combine sourdough starter, water, and olive oil. Add flour and salt, then mix until a shaggy dough forms and no dry flour remains. Cover the bowl and let the dough rest for 20–30 minutes to hydrate.

Stretch and Folds
Over the next 1–2 hours, perform a series of stretch and folds every 30 minutes. To do this, grab one side of the dough, stretch it upward, and fold it over itself. Rotate the bowl and repeat 3–4 times per session until the dough becomes smoother and more elastic.


Bulk Fermentation

Cover. with plastic wrap or a wet towel and let it rise at room temperature for 6–8 hours, You can place it in the oven with light on to recreate a warm environment during the cooler months.

Shaping and Second Rise

Generously coat a 9×13-inch baking pan with olive oil. Gently turn the dough into the pan and flip it once to coat both sides in oil. Carefully stretch it toward the edges, being patient if it resists and allowing it to rest before stretching further.

Cover the pan and let the dough rise again for 1 to 3 hours, until it spreads fully to the edges and looks noticeably puffy. For deeper sourdough flavor, you can refrigerate the dough overnight at this stage and bake the next day after bringing it back to room temperature.

Dimpling and Topping

Preheat your oven to 425°F. Drizzle olive oil generously over the top of the dough. Using your fingertips, press firmly into the dough to create deep dimples across the entire surface.

Sprinkle with flaky salt and add your desired toppings. The dimples help hold olive oil and toppings in place while creating the signature focaccia texture.

Baking the Focaccia

Bake for 20 to 25 minutes, or until the focaccia is golden brown on top with crisp edges. The bottom should be firm and lightly browned.

Remove the bread from the pan and allow it to cool on a wire rack for at least 15 minutes before slicing. This resting time helps set the crumb and improves texture.

Tips for Success with Fresh Milled Flour

Hydration is key when working with fresh milled flour. If the dough feels stiff, add small amounts of water until it reaches a soft, slightly sticky consistency. Proper hydration ensures a light and airy crumb.

Do not rush fermentation. Fresh milled flour benefits from a full bulk rise to soften the bran and develop flavor. If your kitchen is cool, allow extra time for the dough to become properly puffy.

Finally, use plenty of olive oil. It not only adds flavor but also creates the crisp, golden crust that makes focaccia so satisfying.

Serving Ideas

Sourdough focaccia pairs beautifully with soups, salads, and pasta dishes. It also makes excellent sandwich bread when sliced horizontally.

Leftovers can be toasted the next day or used for croutons. The flavor deepens over time, making it just as enjoyable on the second day.

Final Thoughts

Sourdough focaccia with fresh milled flour is a wonderful way to combine traditional baking skills with wholesome ingredients. The nutty flavor of freshly ground grain and the tang of sourdough starter create a bread that feels both rustic and refined.

If you are new to baking with fresh milled flour, this recipe is a perfect place to start. With a stand mixer and a little patience, you can create a golden, airy focaccia that brings warmth and nourishment to your table.

Fresh Milled Flour

The Balanced Week eBook

Mar 2, 2026 · Leave a Comment

A Homemaker’s Guide to Organizing your Week

What if your week felt steady instead of scattered?

What if each day had a clear focus — not a rigid schedule, but a gentle direction?

The Balanced Week was created for the homemaker who is tired of feeling behind. The one who keeps the home running, cares deeply about her family, and longs for more order… but doesn’t want a system that feels harsh or overwhelming.

This guide will help you build a weekly rhythm that supports your home and your energy.

Not hustle.
Not pressure.
Rhythm.

Why Most Weeks Feel Overwhelming

Without structure, everything feels urgent.

Laundry blends into errands. Cleaning competes with appointments. Projects get started but not finished. And by Friday, you’re wondering what you actually accomplished.

The problem isn’t laziness.
It’s a lack of clear focus.

When every day tries to hold everything, the week feels heavy.

The Balanced Week teaches you how to give each day a purpose — so your mind can rest and your work can flow.

What You’ll Learn Inside The Balanced Week

This isn’t a strict planner. It’s a framework you can adapt to your season of life.

Inside, you’ll discover:

– How to choose themed days that fit your family’s rhythm
– How to identify days that need a singular, repeating focus
– How to build daily structure using simple anchors like morning routine, lunch, nap time, and evening reset
– The difference between time blocking and event blocking — and why event blocking works beautifully at home
– How to create structure for both repeating days and irregular days
– How to move from one task to the next without constantly feeling behind

By the end, you’ll have a clear weekly rhythm that bends without breaking.

What Makes This Different

The Balanced Week is built on a hybrid of themed days and the business of the day approach anchored by daily structures:

Themed Days – Each day carries a primary focus so your energy isn’t scattered.

Daily Anchors – Instead of planning by the clock, you build your day around repeatable events: wake up, morning routine, meals, rest time, evening reset.

This creates structure without rigidity.

If the morning runs long, the day continues at the next anchor.
If an appointment interrupts mid-morning, you flow back into rhythm at lunch.

Your week holds steady — even when life shifts.

Who This Is For

The Balanced Week is for:

– Stay-at-home moms
– New homemakers building their first routines
– Women returning to the home after a busy season
– Anyone craving more order, peace, and clarity in their days

If you want your home to feel intentional instead of reactive, this guide is for you.

Imagine a Different Kind of Week

Imagine Mondays dedicated to resetting the home.
Imagine errand days that don’t derail everything else.
Imagine knowing exactly what today is for.

Imagine finishing the week feeling steady — not scrambled.

That’s what The Balanced Week is designed to give you.

Product Details

  • Digital Download
  • PDF Format
  • Instant Access After Purchase
  • For Personal Use Only

You don’t need more pressure.
You need a rhythm that supports you.

If you’re ready to build a week that feels balanced instead of busy, The Balanced Week will gently guide you there.

Get it here…

Homemaking, Homemaking Lifestyle

A Spring Morning Routine for a Peaceful Home

Mar 2, 2026 · Leave a Comment

Spring mornings are a wonderful time to create a sense of calm and renewal in your home. The fresh air, sunlight, and gentle energy of the season provide the perfect backdrop for a peaceful start to the day. A structured morning routine can help homemakers feel grounded, productive, and ready to care for their family without stress.

Starting your day with intention allows you to set the tone for the rest of your home. When mornings are organized and calm, daily tasks feel easier and less overwhelming. By establishing simple habits, you can enjoy a harmonious environment that supports both productivity and relaxation.

This post provides a practical spring morning routine designed to create a peaceful home. Each step is realistic, easy to implement, and focused on restoring energy and clarity. Following this routine can transform chaotic mornings into a time of serenity and preparation for the day ahead.

Wake Up Early and Enjoy Quiet Time

Begin your day early before the household wakes up. This quiet period allows you to gather your thoughts, plan your day, and enjoy a few moments of solitude. Starting with a calm mindset sets the tone for the entire morning.

Use this time for meditation, prayer, or simple reflection. Even five to ten minutes of intentional quiet can reduce stress and improve focus. Creating a personal space for calm each morning helps you approach your day with peace and clarity.

Drink a glass of water or enjoy a warm cup of tea to hydrate and energize your body. Taking care of yourself physically contributes to mental and emotional well-being. Establishing this small ritual can make mornings feel nurturing rather than rushed.

Open Windows and Let in Fresh Air

Spring mornings are ideal for welcoming natural light and fresh air into your home. Open windows in living areas and bedrooms to circulate air and invite the season indoors. Fresh air instantly energizes the senses and makes spaces feel clean and renewed.

While the air flows through your home, take a few minutes to stretch or do light exercises. Gentle movement improves circulation and awakens the body naturally. Incorporating this step helps you feel alert and ready for the day without caffeine or heavy stimulation.

Check on plants or flowers indoors as part of your morning routine. Watering or gently arranging greenery brings a sense of life and calm to your home. Caring for your surroundings enhances mindfulness and adds a simple beauty to the start of each day.

Tidy and Prepare the Home

Spend a few minutes straightening up shared spaces like the kitchen, living room, and dining area. Clearing clutter and wiping surfaces prevents the house from feeling chaotic later in the day. A tidy home contributes to a peaceful atmosphere and helps family members start the day with ease.

Prepare breakfast or plan the morning meal in advance. Setting out ingredients or pre-assembling simple dishes reduces stress and allows everyone to enjoy a calm start. A well-prepared kitchen supports both nutrition and relaxation.

Incorporate small tasks like making beds, starting laundry, or organizing mail. These simple actions create a sense of accomplishment and structure early in the day. Completing foundational tasks first allows the rest of the day to flow smoothly and peacefully.

Practice Mindful Family Interaction

Once the household begins to wake, engage with family members in a calm and intentional way. Greet each person warmly and spend a few moments together before diving into responsibilities. Mindful interactions foster harmony and reduce morning tension.

Encourage children to participate in simple morning routines like making their beds, tidying toys, or helping set the table. Involving them teaches responsibility while keeping mornings organized. Small cooperative tasks create a sense of teamwork and shared purpose.

Keep conversations light and focused on positive topics. Avoid rushing or introducing stressors at the start of the day. A peaceful tone in the morning sets a foundation for productive and enjoyable family interactions throughout the day.

Final Thoughts

A spring morning routine can transform your home into a place of calm, energy, and order. By waking early, letting in fresh air, tidying, and practicing mindful interactions, mornings become intentional and peaceful rather than rushed.

Establishing these small habits supports both your well-being and the harmony of your household. Each step, though simple, contributes to a smoother day, reduced stress, and a sense of renewal for the season.

Creating a peaceful home starts in the morning, and a thoughtful spring routine helps you embrace the season while nurturing yourself and your family. Consistency and mindfulness in these small daily actions allow your home to feel organized, light, and welcoming.

Homemaking, Homemaking Lifestyle

The Homemaker’s Guide to Decluttering: Simplify Your Home and Life

Mar 2, 2026 · Leave a Comment

Decluttering is one of the most powerful ways homemakers can create a sense of calm and order in their home. A cluttered environment can increase stress, reduce productivity, and make even simple tasks feel overwhelming. By intentionally organizing and letting go of what no longer serves your household, you can create a home that feels peaceful, functional, and welcoming.

Simplifying your space doesn’t have to be complicated or time-consuming. With a clear plan, you can tackle clutter in manageable steps and make lasting changes. This guide will help you understand how to approach decluttering thoughtfully, focus on what truly matters, and create systems that work for your family’s lifestyle.

The goal of decluttering is not perfection but intentional living. Every item you choose to keep or remove should serve a purpose or bring you joy. With a practical strategy, even a busy homemaker can transform her home into a space of clarity, calm, and efficiency.

Identify Problem Areas

The first step in decluttering is recognizing which areas of your home need attention. Walk through each room and note spaces that feel crowded, disorganized, or underutilized. Common areas include entryways, kitchen counters, closets, and toy rooms.

Take photos or make a short list of the spaces that overwhelm you the most. Seeing the problem visually can help you prioritize which areas to tackle first. Identifying the main clutter hotspots allows you to focus your energy where it matters most.

Avoid trying to declutter everything at once. Starting with one problem area prevents burnout and sets you up for success. Small wins build momentum and make the decluttering process feel achievable.

Sort and Categorize

Once you know your problem areas, start sorting items into categories. Use the classic keep, donate, and discard system to make decisions easier. Be honest about what you use, what you love, and what only takes up space.

Create designated bins or boxes for each category to keep things organized. Labeling helps prevent confusion and ensures the process stays efficient. Categorizing items makes it easier to see what you truly need and what can be released.

Involve your family when possible. Children can help sort toys, and partners can assist with household items. Working together not only speeds up the process but also encourages everyone to value a tidy, functional home.

Focus on Function and Joy

Decluttering isn’t just about removing things; it’s about keeping what enhances your life. Ask yourself if an item serves a purpose or brings you happiness. Items that fail both tests should be released to make room for clarity and ease.

Consider how each space functions for your family. Organize items in a way that makes daily routines smoother, whether it’s meal prep, laundry, or morning routines. Functional organization ensures that your home works for you, not against you.

Remember, letting go can be emotional, but the result is liberating. Releasing unnecessary belongings opens both physical and mental space. A home organized around purpose and joy feels lighter, calmer, and more inviting for everyone.

Create Systems to Maintain Order

Decluttering is just the first step; maintaining order is key to long-term success. Implement simple habits like putting items back after use, regularly assessing possessions, and keeping surfaces clear. Daily routines prevent clutter from accumulating again.

Use storage solutions you already have, like baskets, trays, and containers, to make organization easy. Label shelves or drawers for clarity, especially in busy areas like the kitchen or children’s rooms. Systems reduce decision fatigue and keep your home running smoothly.

Set aside time each week or month to review spaces. Small maintenance sessions prevent clutter from returning and ensure your home continues to feel calm and functional. A consistent approach reinforces the benefits of decluttering over time.

Final Thoughts

Decluttering is an essential practice for homemakers who want a peaceful, functional, and joyful home. By identifying problem areas, sorting items, and focusing on function and joy, you can create a space that supports your lifestyle.

Maintaining order with simple systems ensures the home stays organized long after the initial decluttering. The process is less about perfection and more about intentional living.

A simplified, thoughtfully organized home reduces stress, boosts productivity, and provides a nurturing environment for your family. Following this guide helps homemakers embrace clarity, calm, and balance in every corner of their home.

Homemaking, Homemaking Lifestyle

11 Quick Breakfasts for Busy Mornings

Mar 2, 2026 · Leave a Comment

Mornings can feel rushed, especially when you’re juggling family life, work, or a full homemaking routine. Having a list of quick breakfast ideas makes it easier to start the day well without feeling stressed or tempted to skip the most important meal. The good news is that breakfast does not have to be complicated to be nourishing and satisfying.

Quick breakfasts can still be wholesome, filling, and even comforting. With a little planning and a few simple ingredients on hand, you can put together meals that fuel your body and keep everyone happy until lunchtime. Many of these options can also be prepped ahead, which makes busy weekdays much smoother.

Below you’ll find 11 quick breakfasts that are easy to make, family-friendly, and perfect for mornings when time is limited. Each idea uses simple ingredients and minimal prep, so you can get food on the table fast without sacrificing quality.

1. Overnight Oats

Overnight oats are one of the easiest make-ahead breakfasts you can prepare. Simply combine rolled oats, milk or yogurt, and your favorite toppings in a jar and refrigerate overnight.

Another option is overnight oat groats. If rolled spike your blood sugar, try oat groats. It’s still just as easy to prepare with all the benefits of the whole oat kernel. You simply dump them in the instant pot to soak overnight on a delay timer so that it cooks on its own before you are out of bed.

In the morning, breakfast is ready to grab and enjoy. Add fruit, nuts, honey, or peanut butter for variety, and switch up flavors throughout the week to keep things interesting.

2. Scrambled Eggs and Toast

Scrambled eggs are a classic quick breakfast that comes together in minutes. Whisk eggs with a splash of milk, cook in a buttered skillet, and serve with warm toast.

This simple meal provides protein and healthy fats to keep you full. Add sliced avocado or fresh fruit on the side for a more balanced plate.

3. Greek Yogurt Parfait

A Greek yogurt parfait feels special but takes almost no time to assemble. Layer thick Greek yogurt with granola and fresh berries in a bowl or jar.

The combination of protein, fiber, and natural sweetness makes this a refreshing option. It’s also easy to customize depending on what fruit you have on hand.

4. Peanut Butter Banana Toast

Peanut butter banana toast is both quick and satisfying. Spread peanut butter over toasted bread and top with sliced bananas and a drizzle of honey if desired.

This breakfast offers a great mix of protein and carbohydrates for steady energy especially if you make your own sourdough bread.

5. Smoothies

Smoothies are perfect for busy mornings when you need something portable. Blend frozen fruit, peanut butter, yogurt or kefir, and milk for a nutrient-packed drink in under five minutes.

You can prep smoothie ingredients in freezer bags ahead of time to make mornings even easier. Simply dump the contents into the blender and blend.

6. Breakfast Burritos

Breakfast burritos are a hearty option that can be made quickly or prepped in advance. Fill a tortilla with scrambled eggs, cheese, and cooked sausage.

Wrap tightly and enjoy immediately, or make several and freeze for later. Reheat in the microwave for a fast, filling breakfast.

7. Cottage Cheese and Fruit

Cottage cheese is a high-protein breakfast that requires no cooking at all. Spoon it into a bowl and top with fresh fruit or a handful of nuts.

This option is light yet satisfying and works well for busy mornings. Add a drizzle of honey or a sprinkle of cinnamon for extra flavor.

8. Avocado Toast

Avocado toast is simple, nourishing, and trendy for good reason. Mash ripe avocado onto toasted bread and season with salt, pepper, and a squeeze of lemon.

For added protein, top with a fried or poached egg. It’s a balanced breakfast that feels fresh and satisfying without much effort.

9. Muffins

Homemade muffins can be baked ahead and enjoyed throughout the week. Switch it up with options like blueberry, banana, or orange cranberry for a quick grab-and-go meal.

Pair a muffin with yogurt or a boiled egg to add protein. This combination keeps the meal balanced and helps prevent mid-morning hunger.

10. Hard-Boiled Eggs and Fruit

Hard-boiled eggs are easy to prepare in batches and store in the refrigerator. Peel and pair them with sliced apples, berries, or oranges for a simple breakfast.

This combination is portable and packed with protein and vitamins. It’s an excellent option for mornings when you need something quick and nutritious.

11. Breakfast Quesadilla

A breakfast quesadilla is fast and family-friendly. Sprinkle cheese and leftover scrambled eggs between two tortillas and cook in a skillet until golden and melted.

Slice into wedges and serve with salsa or avocado. This warm, comforting breakfast feels hearty but comes together in just a few minutes.

For extra protein without eggs, use leftover fresh milled sourdough tortillas.

Final Thoughts

Quick breakfasts do not have to be boring or unhealthy. With a little preparation and a handful of reliable ideas, you can make mornings smoother while still serving nourishing meals your family will enjoy. Keeping ingredients like eggs, yogurt, fruit, and bread stocked makes it easy to mix and match these options.

Choose a few favorites to rotate throughout the week, and consider prepping ahead whenever possible. A simple, wholesome breakfast sets the tone for the entire day and helps you begin each morning feeling calm, prepared, and well-fed.

Recipes

10 Ways to Refresh Your Home for Spring Without Spending Money

Mar 2, 2026 · Leave a Comment

Spring is the perfect time to bring new energy into your home. After months of winter, spaces can feel heavy, cluttered, or stale. Refreshing your home doesn’t have to involve spending money or buying new décor. Simple, intentional changes using what you already have can create a lighter, brighter, and more welcoming atmosphere.

Refreshing your home for spring is about focusing on what matters most. It means clearing clutter, deep cleaning, and reorganizing spaces to improve both function and appearance. By taking small, practical steps, you can transform your home without financial investment while reducing stress and increasing enjoyment.

This post provides ten practical ways to refresh your home for spring without spending money. Each strategy is realistic and actionable, designed to create a sense of renewal in every room. Following these tips will leave your home feeling fresh, organized, and ready for the season.

1. Declutter High-Traffic Areas

Start by removing items that no longer serve a purpose from high-traffic areas like countertops, entryways, and living spaces. Clutter creates visual chaos and makes spaces feel smaller and more stressful. Focusing on clearing these areas first immediately improves the look and feel of your home.

Sort items into keep, donate, or discard piles. Be honest about what adds value to your home and what just takes up space. Letting go of unnecessary belongings frees up both physical and mental space.

Encourage family members to help with decluttering. Children can sort toys and partners can assist with organizing shared spaces. Involving everyone teaches responsibility and reduces the burden on you as the homemaker.

2. Deep Clean Forgotten Spaces

Next, tackle areas often overlooked during regular cleaning. Dust ceiling fans, baseboards, vents, and window sills to remove built-up dirt. Wiping down neglected surfaces instantly refreshes the appearance of rooms.

Clean inside and behind appliances if possible. This small effort can dramatically improve both cleanliness and air quality. Using household staples like vinegar and baking soda makes this task cost-free and effective.

Take your time and approach each room methodically. Deep cleaning neglected areas brings a sense of accomplishment and shows your home more care. It also sets a strong foundation for maintaining cleanliness in the weeks ahead.

3. Refresh Fabrics and Linens

Wash curtains, pillow covers, throw blankets, and table linens. Clean fabrics instantly make rooms feel lighter and fresher. Rotate winter linens for lighter, spring-inspired colors if you have them available.

Refluff pillows, air out mattresses, and tidy bedding. Even small adjustments like folding blankets neatly or rearranging throw pillows make rooms feel renewed. Clean and organized fabrics contribute to a polished and comfortable home.

Don’t forget small textiles like kitchen towels, rugs, and doormats. Washing and straightening these items improves both hygiene and overall appearance. Fresh fabrics give the impression of a well-cared-for home without spending a penny.

4. Rearrange Furniture and Décor

Small changes in furniture placement can make rooms feel new and inviting. Shift seating, tables, or shelves to open walkways or create fresh focal points. Even minor adjustments can dramatically improve the flow and energy of a space.

Repurpose items you already have as functional décor. Use baskets for storage, trays for organizing small items, or jars to display seasonal finds. Rearranging what you already own creates a sense of novelty without cost.

Consider rotating decorations between rooms or using natural elements like branches or flowers. These subtle changes add life and seasonal charm to your home. Creativity with existing décor gives your spaces a refreshed appearance instantly.

5. Open Windows and Let in Fresh Air

Fresh air improves both your home and your mood. Open windows to circulate air, remove stale winter odors, and naturally brighten spaces. Airflow alone makes rooms feel cleaner and more energizing.

Move furniture or rugs to allow sunlight to reach more areas. Natural light highlights your home’s best features and creates a welcoming atmosphere. Seasonal changes in lighting can refresh the feel of any room.

Clean windowpanes for a clear view and enhanced brightness. Even a quick wipe of the glass makes a noticeable difference. Combining fresh air and sunlight creates a naturally uplifting spring ambiance.

6. Declutter Storage and Hidden Spaces

Organize closets, cabinets, and storage bins to remove forgotten clutter. Out-of-sight spaces often hold unnecessary items that weigh down your home. Sorting through these areas creates both physical space and mental clarity.

Donate, recycle, or discard anything that hasn’t been used in the past year. Keeping only what is needed or loved improves organization and efficiency. Simplifying storage spaces also makes finding items easier in daily routines.

Repurpose containers or boxes you already have to create more organized storage. Labeling and grouping items enhances usability without spending money. A well-organized home feels calm and intentional.

7. Clean and Refresh Floors

Vacuum carpets, sweep hard floors, and mop thoroughly. Clean floors instantly improve the appearance and feel of a home. High-traffic areas like entryways, kitchens, and living rooms benefit most from focused attention.

Rotate rugs and clean under furniture to remove hidden dust and debris. A refreshed floor space makes the entire room feel renewed. Floors are a foundation for a clean, comfortable home and impact the overall impression of your space.

Use household items to add polish or shine to floors if needed. Even simple touches like washing baseboards or dusting corners enhance the overall aesthetic. Clean floors contribute to a sense of order and freshness throughout your home.

8. Incorporate Natural Elements

Bring nature indoors using flowers, branches, or leaves from your yard. Natural elements add color, texture, and life to any room without spending money. Seasonal touches also make spaces feel lively and welcoming.

Rearrange plants or move potted greenery to different areas for a fresh perspective. Even a small cluster of blooms on a table can create a focal point and elevate the room’s energy. Nature adds beauty and vitality to everyday life.

Use natural containers you already own, like jars or baskets, to display plants or floral arrangements. Creativity with items on hand enhances the visual impact. These elements celebrate the arrival of spring and connect your home to the season.

9. Rotate and Refresh Décor

Move decorative items from one room to another to give spaces a fresh look. Small rotations, like changing picture frames or candle arrangements, make rooms feel different without cost. This simple strategy keeps your home interesting and visually appealing.

Swap seasonal décor from storage to highlight spring colors or textures. Even subtle changes create the perception of a refreshed home. Focus on items that bring joy and enhance the aesthetic of each room.

Get creative with displays on shelves, tables, or mantels. Arranging items thoughtfully draws the eye and creates a sense of intentional design. Rotating décor keeps your home feeling dynamic and cared for throughout the season.

10. Create a Cleaning and Maintenance Routine

Maintain your refreshed home with a simple routine that prevents clutter and buildup. Daily tidying, weekly dusting, and quick surface wipes keep your space clean and organized. Consistency is more important than perfection.

Involve your family in small daily tasks to share responsibility. Even children can assist with organizing toys, wiping tables, or sorting laundry. A shared approach keeps the home running smoothly and reduces stress on the homemaker.

Use small checklists or themed days to structure ongoing upkeep. A simple routine ensures your home remains light, bright, and welcoming long after your spring refresh. Intentional habits reinforce the work you’ve done and create lasting benefits.

Final Thoughts

Refreshing your home for spring doesn’t require spending money or buying new items. By decluttering, deep cleaning, rearranging, and incorporating natural elements, you can create a sense of renewal using what you already have.

A structured approach, such as themed days or focused tasks, makes the process manageable and sustainable. Simple adjustments like cleaning, organizing, and rotating décor can have a significant impact on the feel of your home.

Spring is a season of new beginnings, and refreshing your home creates a light, bright, and joyful environment. Following these ten no-cost strategies allows you to embrace the season fully while keeping your energy and budget intact.

Homemaking, Homemaking Lifestyle

Fresh Milled Sourdough Pretzel Bites

Mar 2, 2026 · Leave a Comment

Fresh milled sourdough pretzel bites are definitely a good addition to for your recipe box. The are a treat for both kids and adults alike. The deep brown crust, the soft and chewy center, and that sprinkle of salt on top make them quite irresistible.

These sourdough pretzel bites are the perfect way to use active starter and create an easy to share snack. They work just as well for a family movie night as they do for a holiday gathering or church potluck. Simple ingredients and a little patience are all you need.

If you’ve never made homemade pretzels before, don’t worry. This step-by-step guide will walk you through the process so you can confidently create soft, bakery-style sourdough pretzel bites right at home. They were a lot easier to make than I realized.

Fresh Milled Sourdough Pretzel Bites

Fresh Milled Sourdough Pretzel Bites

Fresh milled sourdough pretzel bites are definitely a good addition to for your recipe box. The are a treat for both kids and adults alike.

Prep Time 8 hours
Cook Time 12 minutes
Additional Time 10 minutes
Total Time 10 minutes

Ingredients

  • DOUGH
  • 1/2 cup sourdough starter (100g)
  • 1 cup water (230g)
  • 1 tablespoon sugar or honey
  • 1 teaspoon salt
  • 3 1/2 cups flour (450g)
  • BAKING SODA BATH
  • 4 cups water
  • 1/4 cup baking soda
  • TOPPING
  • salt
  • 1 Egg, for egg wash

Instructions

    1. Mill the Wheat Berries

    Place your mixing bowl on the scale and tare it to zero. Then weight out 450g of soft white wheat berries. Dump them into the grain mill and mill your flour.

    2. Mix and Knead the Dough

    Add the sourdough starter, water, honey, salt, and flour into the bowl of a stand mixer. Knead on low speed for 15 minutes until the dough becomes smooth and elastic.

    3. Let the Dough Rise

    Cover the bowl and allow the dough to rise for 6-8 hours at room temperature, or until doubled in size.

    During colder months, place the covered bowl in the oven with the oven light on to create a warmer environment. This simple trick helps speed up fermentation without overheating the dough.

    4. Shape the Pretzel Bites

    Preheat your oven to 425°F and line a baking sheet with parchment paper.

    Turn the dough onto a lightly floured surface and divide it into 6 equal pieces. Roll each piece into a rope about 1 inch thick. Using a sharp knife or bench scraper, cut each rope into bite-sized pieces.

    5. The Baking Soda Bath

    Boil 3-4 cups of water in a kettle and pour into a large bowl. I like to use my mixing bowl since it's stainless steels. Stir in 1/4 cup baking soda until dissolved.

    Drop the pretzel bites into the baking soda bath for 20 to 30 seconds. This step is essential — it gives pretzels their signature chewy crust and deep golden color.

    Remove the bites with a slotted spoon and place them on the prepared baking sheet. Sprinkle generously with salt.

    6. Bake Until Golden Brown

    Bake the pretzel bites for 12 to 15 minutes, or until they are deep golden brown.

    Once out of the oven, brush with melted butter or oil if desired. Allow them to cool slightly before serving — though they are best enjoyed warm.

Did you make this recipe?

Please leave a comment on the blog or share a photo on Pinterest

© Naomi Scott

Why You Should Mill Your Own Flour

Milling your own flour allows you to keep all the natural nutrients found in the whole grain, including the bran and germ that are often removed in store-bought flour. Freshly milled flour has a richer flavor, better texture, and higher nutritional value because it hasn’t been sitting on a shelf losing freshness over time. It also gives you more control over the type of grain you use, helping you create wholesome, from-scratch baked goods that truly nourish your family.

Ingredients

For the Dough
1/2 cup sourdough starter (100g)
1 cup water (230g)
1 tablespoon sugar or honey
1 teaspoon salt
3 1/2 cups flour (450g)

For the Baking Soda Bath
4 cups water
1/4 cup baking soda

For Topping

salt

1 Egg, for egg wash

How to Make Sourdough Pretzel Bites

1. Mill the Wheat Berries

Place your mixing bowl on the scale and tare it to zero. Then weight out 450g of soft white wheat berries. Dump them into the grain mill and mill your flour.

2. Mix and Knead the Dough

Add the sourdough starter, water, honey, salt, and flour into the bowl of a stand mixer. Knead on low speed for 15 minutes until the dough becomes smooth and elastic.

3. Let the Dough Rise

Cover the bowl and allow the dough to rise for 6-8 hours at room temperature, or until doubled in size.

During colder months, place the covered bowl in the oven with the oven light on to create a warmer environment. This simple trick helps speed up fermentation without overheating the dough.

4. Shape the Pretzel Bites

Preheat your oven to 425°F and line a baking sheet with parchment paper.

Turn the dough onto a lightly floured surface and divide it into 6 equal pieces. Roll each piece into a rope about 1 inch thick. Using a sharp knife or bench scraper, cut each rope into bite-sized pieces.

The Baking Soda Bath (The Secret to That Classic Pretzel Texture)

Boil 3-4 cups of water in a kettle and pour into a large bowl. I like to use my mixing bowl since it’s stainless steels. Stir in 1/4 cup baking soda until dissolved.

Drop the pretzel bites into the baking soda bath for 20 to 30 seconds. This step is essential — it gives pretzels their signature chewy crust and deep golden color.

Remove the bites with a slotted spoon and place them on the prepared baking sheet. Sprinkle generously with salt.

Bake Until Golden Brown

Bake the pretzel bites for 12 to 15 minutes, or until they are deep golden brown.

Once out of the oven, brush with melted butter or oil if desired. Allow them to cool slightly before serving — though they are best enjoyed warm.

Optional Add-Ons and Flavor Variations

These fresh milled sourdough pretzel bites are easy to customize depending on the occasion.

  • For a classic finish, brush with melted butter immediately after baking.
  • For a sweet version, skip the salt and toss warm pretzel bites in cinnamon sugar.
  • For a savory twist, sprinkle shredded cheddar cheese on top before baking.
  • Serve alongside warm cheese sauce or honey mustard for dipping.

Final Thoughts

Fresh milled sourdough pretzel bites are one of those simple recipes that feel special every time you make them. They are practical enough for everyday baking but festive enough for holidays and gatherings. With just a few pantry staples and your faithful sourdough starter, you can create soft, chewy pretzel bites that the whole family loves.

Fresh Milled Flour

Spring Meal Planning for the Homemaker: Simple, Fresh, and Frugal

Mar 2, 2026 · Leave a Comment

Spring is the perfect season to refresh your meal planning. After the heavier meals of winter, lighter, fresher dishes feel invigorating and more manageable. For homemakers, planning meals around themed days can simplify grocery shopping, reduce stress, and make daily cooking enjoyable.

Meal planning does not need to be complicated or expensive. By focusing on seasonal produce and simple recipes, you can feed your family wholesome meals while keeping costs low. A structured plan saves time and energy while maintaining variety in the weekly menu.

This post provides a practical, realistic spring meal planning checklist broken down by themed days. Each day focuses on a specific type of meal or preparation style, making it easy to follow. By the end, you’ll have a strategy to make your kitchen routine smoother and more enjoyable.

Monday: Meatless Monday

Start the week with meatless meals to save money and introduce lighter dishes. Try recipes featuring beans, lentils, or seasonal vegetables. These meals are healthy, filling, and easy to prepare ahead of time.

Meatless meals also encourage creativity in the kitchen. Experiment with vegetable stir-fries, pasta dishes, or hearty grain bowls. By planning simple vegetarian options, you reduce grocery costs and introduce new flavors to your family.

Preparing a meatless dish does not mean sacrificing flavor. Use herbs, spices, and fresh ingredients to create satisfying meals. With a bit of planning, Meatless Monday becomes a favorite day of the week.

Tuesday: Soup or Stew Day

Tuesday is perfect for soups and stews, which can be made in large batches and stored for later meals. Use seasonal vegetables, leftover grains, or small amounts of meat for a frugal, hearty option. One-pot meals save time and minimize cleanup.

Soups and stews also provide flexibility. You can freeze portions for quick lunches or dinners during a busy week. A simple base of broth, vegetables, and beans can be adapted to suit your family’s preferences.

Enhance flavor with herbs, spices, and a touch of acidity like lemon or vinegar. These meals are comforting and satisfying without being heavy. Soup day becomes a time-efficient way to nourish your family with minimal effort.

Wednesday: Quick and Easy Dinners

Midweek often demands fast meals, so Wednesday is ideal for quick and easy recipes. Think sheet-pan dinners, stir-fries, or simple pasta dishes. These meals require minimal prep and are ready in under 30 minutes.

Keep pantry staples on hand for speedy preparation. Canned beans, frozen vegetables, pasta, and rice can be combined with fresh ingredients for balanced meals. Simple sauces like tomato, pesto, or a light vinaigrette enhance flavor without extra effort.

Quick dinners do not have to be boring or repetitive. Rotate different vegetables, grains, and proteins to keep meals interesting. Efficiency combined with variety ensures midweek meals stay enjoyable for your family.

Thursday: Freezer-Friendly Meal Prep

Use Thursday to prepare meals that can be frozen for later use. Lasagna, casseroles, soups, and cooked grains freeze well and save time on busy days. This approach reduces the stress of last-minute cooking.

Portion meals into individual or family-sized containers for convenience. Label each container with the date and contents for easy access. Freezer-friendly meals make dinner effortless and prevent reliance on takeout.

Include versatile recipes that can be mixed and matched. For example, cooked chicken can be used in tacos, salads, or sandwiches. Meal prep days give you control over both nutrition and convenience.

Friday: Family Favorites

Friday is a great day to cook your family’s favorite meals. Plan dishes that everyone enjoys, from roasted chicken to homemade pizza. Celebrating the week with familiar comfort food creates a sense of routine and joy.

Use this day to involve the whole family in cooking. Children can help with preparation or setting the table, making mealtime interactive and fun. Family favorites bring warmth and connection to your homemaking rhythm.

Keep portions balanced with vegetables, grains, and proteins. Even comfort meals can be nutritious and fresh. A Friday feast signals the weekend while keeping meals practical and satisfying.

Saturday: Seasonal Vegetable Focus

Spring is the perfect time to feature fresh, seasonal produce. Saturday can be dedicated to meals that highlight vegetables like asparagus, peas, spinach, or radishes. Fresh ingredients add vibrant flavor and color to your plates.

Plan simple side dishes like roasted vegetables, salads, or grain bowls to complement proteins. Seasonal produce is often affordable and plentiful, making this a frugal and healthy approach.

Experiment with herbs, dressings, and light sauces to enhance natural flavors. Incorporating seasonal vegetables reinforces healthy eating habits and makes spring meals feel light and fresh.

Sunday: Slow-Cooked or Special Occasion Meals

Sunday is ideal for slow-cooked meals or dishes that require more attention. Roast, braise, or cook a large meal that fills the house with comforting aromas. This day allows you to enjoy the process without feeling rushed.

Use Sunday meals to try new recipes or showcase seasonal ingredients. A longer cooking time often enhances flavor and allows you to relax while your meal cooks. These meals can also provide leftovers for the week, reducing weekday cooking stress.

Incorporate a small family ritual like sharing stories at the table or serving a simple dessert. Sunday meals can become the highlight of the week, reinforcing family connection.

Final Thoughts

Spring meal planning does not need to be stressful or complicated. By using themed days, stay-at-home moms can organize their week with simple, fresh, and frugal meals.

Focusing on seasonal produce, quick meals, and batch cooking makes daily cooking manageable and enjoyable. Intentional planning allows you to nourish your family efficiently while maintaining a sense of calm and order.

With a practical spring meal plan, your kitchen becomes a space of creativity, simplicity, and comfort. Following a themed-day approach ensures your family enjoys wholesome meals while freeing your time for the joys of homemaking.

Download the free printable here!

Homemaking, Homemaking Lifestyle

Simple Spring Cleaning Checklist for Stay-at-Home Moms

Mar 2, 2026 · Leave a Comment

Spring is the perfect season for a fresh start in your home. After months of winter, clutter can accumulate, surfaces can gather dust, and routines can feel stale. For stay-at-home moms, tackling it all at once can feel overwhelming. A practical, themed-day approach breaks the work into manageable steps that fit naturally into your week.

Themed days allow you to focus on specific tasks each day rather than trying to clean everything at once. This method reduces stress and makes your cleaning more effective. By following a consistent schedule, your home can feel lighter, brighter, and more organized without exhausting yourself.

A spring cleaning checklist with themed days creates rhythm in your week. Each day becomes purposeful, allowing you to check off tasks while still caring for your family and routines. This post will guide you through a simple and realistic plan to refresh your home from top to bottom.

Monday: Laundry and Linens

Start the week by tackling laundry and household fabrics. Wash bed linens, towels, tablecloths, and throw blankets to remove winter dust and odors. Keeping up with laundry first ensures clean, fresh textiles throughout your home for the week.

Take the time to rotate bedding or air out mattresses if possible. This simple step improves comfort and freshness in bedrooms. Folding and organizing clean laundry immediately prevents new clutter from forming.

Include small items like dish towels, kitchen rags, and pet bedding. A complete refresh of fabrics creates a sense of order and cleanliness that you and your family will notice immediately.

Tuesday: Dusting and Surfaces

Focus on dusting all surfaces around the house. Wipe baseboards, windowsills, shelves, and furniture to remove built-up dust from winter. Dusting before vacuuming ensures you capture all particles for a truly clean home.

Don’t forget high surfaces like ceiling fans, light fixtures, and vents. Dust and cobwebs often accumulate in overlooked areas. Cleaning these spots enhances air quality and prevents allergens from circulating.

Include electronics and decorative items in your dusting routine. Wiping down picture frames, lamps, and small décor adds to the sense of freshness in each room. A careful sweep creates a polished and renewed look throughout your home.

Wednesday: Bathrooms

Set aside a day for deep cleaning bathrooms. Scrub sinks, tubs, and toilets thoroughly to remove grime and soap buildup. Cleaning mirrors and wiping down cabinets restores shine and freshness to the space.

Replace or launder bathroom rugs and towels to ensure everything feels clean and inviting. Consider swapping in lighter colors for a spring-inspired refresh. A clean bathroom instantly lifts the energy of your home and promotes comfort.

Check and restock supplies like toilet paper, soap, and hand towels. Organized and well-stocked bathrooms make daily routines smoother and reduce stress. Taking time for these details ensures a fully functional and welcoming space.

Thursday: Kitchen Deep Clean

Focus on kitchen surfaces, appliances, and pantry organization. Wipe down countertops, cabinet fronts, and backsplash areas to remove grease and dust. Cleaning appliances inside and out keeps your kitchen sanitary and visually appealing.

Check expiration dates in the fridge, freezer, and pantry. Remove items that are outdated and reorganize remaining foods for easy access. A tidy, organized kitchen simplifies meal prep and promotes a sense of calm.

Clean small kitchen textiles such as dish towels, potholders, and table linens. These details add a fresh touch to a heavily used space. Completing your kitchen refresh makes the heart of your home feel light and functional.

Friday: Floors and Entryways

Dedicate a day to floors and high-traffic areas. Vacuum carpets, sweep and mop hard surfaces, and remove dirt and debris from entryways. Fresh floors create a sense of completion after a week of cleaning.

Don’t forget to clean rugs and mats. Washing or shaking them out enhances cleanliness and reduces allergens. Polished floors and tidy entryways give a strong first impression of a refreshed home.

Include spots often overlooked, like corners, under furniture, and behind doors. Attention to these details makes your home feel truly cared for. This final step wraps up your weekly spring cleaning with a sense of accomplishment.

Final Thoughts

A themed-day spring cleaning checklist makes the process manageable and realistic for stay-at-home moms. By focusing on one area each day, you prevent overwhelm and maintain a sense of progress.

This approach balances thoroughness with practicality, allowing you to care for your home without neglecting family or personal routines. With consistent effort, your home will feel lighter, fresher, and more organized.

Spring cleaning is not about perfection; it’s about creating a home that supports calm, comfort, and joy. By following a simple, themed approach, you can welcome the new season with intention and ease.

Download the free printable here!

Homemaking, Homemaking Lifestyle

7 Homemaking Habits You Need to Stop Doing Today

Mar 2, 2026 · Leave a Comment

Homemaking is a rewarding calling, but it can easily become overwhelming if we take on unnecessary tasks or cling to routines that no longer serve us. Many homemakers fall into habits that drain energy without adding value to the home or family. Recognizing these tasks and letting them go can free your time, reduce stress, and create space for what truly matters.

It’s important to remember that stopping certain activities is not about laziness or neglect. It’s about being intentional with your energy and prioritizing tasks that support a peaceful, well-ordered home. When you release non-essential responsibilities, you make room for care, creativity, and calm.

This guide will explore seven tasks homemakers can stop doing today. Each one highlights a common habit or expectation that often adds more stress than benefit. By the end, you’ll feel encouraged to simplify your routine while still nurturing a beautiful, functional home.

1. Stop Trying to Clean Everything Perfectly

Perfection in cleaning is a trap that many homemakers fall into, especially in high-traffic areas like the kitchen and living room. Chasing a spotless home can consume hours and leave you exhausted with little satisfaction. Instead, focus on areas that truly impact your family’s comfort and health.

A tidy, functional home is far more important than a pristine one. Prioritize counters, floors, and surfaces that affect daily living. Let other areas wait until you have time or when a deeper clean is truly necessary.

Accept that some clutter or dust is natural and even comforting in a lived-in home. Children, pets, and life itself create movement and warmth. Choosing peace over perfection frees energy for the tasks that actually matter.

2. Stop Overcomplicating Meals

Meal preparation is a daily task that can quickly feel like a burden if you overcomplicate it. Following elaborate recipes or trying to impress with presentation every day is unrealistic and exhausting. Simple, nutritious meals serve your family well without requiring perfection.

Focus on meals that are easy, wholesome, and repeatable. Dishes like roasted vegetables, one-pot meals, and simple baked goods often become favorites. Consistency and nourishment are more valuable than elaborate plating.

Remember that children and spouses often care more about being together at the table than the aesthetics of the meal. Reducing stress in the kitchen frees you to enjoy mealtime. Simple meals create rhythm and stability in your home.

3. Stop Saying Yes to Every Request

Many homemakers fall into the habit of overcommitting to others’ needs, whether it’s volunteering, hosting, or extra errands. Constantly saying yes leaves little time for your own priorities or family. Setting boundaries is essential for a balanced home and personal well-being.

Evaluate requests carefully and only commit to what aligns with your family’s needs and your own energy. Politely decline tasks that feel unnecessary or overextending. Your time is valuable, and preserving it ensures you can give your best where it matters most.

Boundaries teach others to respect your schedule and create a predictable, peaceful environment at home. When you say no strategically, you are not being selfish — you are maintaining balance and focus. Your family benefits when your energy is intentional.

4. Stop Trying to Do Everything Alone

Homemakers often shoulder too much responsibility without asking for help. Whether it’s laundry, cooking, cleaning, or errands, taking it all on yourself is exhausting and unnecessary. Sharing tasks with family members fosters teamwork and lightens your load.

Children can be given age-appropriate chores like folding napkins, sorting laundry, or wiping counters. Partners can assist with meal prep, cleaning, or yard work. Teaching everyone to contribute nurtures responsibility and reduces your stress.

Delegating tasks does not mean your home will be less orderly. On the contrary, shared responsibility creates a more sustainable routine. Letting go of total control frees you to focus on what only you can do, like nurturing traditions and maintaining calm.

5. Stop Comparing Yourself to Others

Social media, blogs, and even friends’ homes can create unrealistic standards for homemaking. Comparing your home, meals, or parenting style to others steals joy and motivation. Focus instead on what works for your unique family, space, and season of life.

Every home and household rhythm is different. Your routines, meals, and décor should serve your family, not an external standard. Embrace what makes your home comfortable, functional, and meaningful.

When you stop comparing, you also stop feeling inadequate. This shift allows you to approach homemaking with creativity, patience, and satisfaction. Your home becomes a reflection of your family’s life, not someone else’s ideals.

6. Stop Hoarding or Holding onto What Doesn’t Serve

Accumulating items “just in case” or keeping things for sentimental reasons that no longer bring joy creates unnecessary clutter. Hoarding or holding onto excess can weigh down your home and your mind. Spring cleaning and intentional purging help reclaim space and peace.

Evaluate possessions honestly. Ask whether each item is used, loved, or meaningful. If it no longer serves a purpose, consider donating, recycling, or repurposing it.

Simplifying your home does not diminish its beauty or value. On the contrary, a decluttered space allows the things you truly cherish to shine. Letting go creates freedom and clarity in your routines.

7. Stop Letting Messes Control Your Mood

A messy room, laundry pile, or cluttered countertop can feel overwhelming, but it does not define your worth or the warmth of your home. Allow yourself grace when the house is not perfect. Your family needs you calm and present more than they need spotless floors.

Instead of reacting emotionally to every mess, create simple routines to manage them without stress. Quick daily tidies, laundry rotation, and intentional resets prevent messes from piling up.

Remember that lived-in homes are full of life. Children, pets, and family activity naturally create disorder. Choosing patience over frustration allows you to maintain joy while managing your home effectively.

Final Thoughts

Homemaking should feel rewarding, not burdensome. By letting go of tasks that add stress or unnecessary pressure, you create more energy for meaningful care, creativity, and connection.

Focus on what truly matters — nurturing your family, maintaining calm routines, and creating a home of warmth and stability. When you stop doing what doesn’t serve, you free yourself to invest in the work that truly matters.

Intentional homemaking is not about doing more, it’s about doing what matters with grace. Start today by releasing these seven tasks and notice how much lighter your home and your spirit feel.

Homemaking, Homemaking Lifestyle

The Ultimate Spring Homemaking Reset Routine

Mar 2, 2026 · Leave a Comment

Spring always feels like a quiet invitation to begin again. After a long winter of closed windows, heavier meals, and slower rhythms, our homes are ready to breathe. A thoughtful reset helps you move into the new season with clarity, peace, and purpose.

This is not about perfection or exhausting yourself in a single weekend. It is about steady, meaningful progress that restores both your home and your spirit. Let’s walk through a simple spring homemaking reset you can do with intention and grace.

1. Clear the Clutter and Lighten the Load

Start by removing what no longer belongs in your space. Winter tends to gather piles of papers, extra blankets, and small items that slowly create visual noise. Clearing surfaces instantly makes your home feel lighter and calmer.

Work room by room and focus on visible areas first. Clear countertops, coffee tables, nightstands, and entryways before tackling drawers or closets. Quick wins build momentum and help you stay motivated.

As you declutter, ask yourself whether each item serves your current season. If it adds beauty or function, keep it with gratitude. If it adds stress or crowding, let it go with confidence.

2. Deep Clean the Forgotten Spaces

Spring is the perfect time to clean the areas that were ignored during busy winter days. Dust ceiling fans, wipe down baseboards, wash windows, and vacuum under furniture. These small details make a dramatic difference in how fresh your home feels.

Open the windows while you work whenever possible. Fresh air not only clears out stale winter air but also boosts your energy. Sunlight streaming in makes even hard work feel hopeful.

Take your time and do not rush the process. Deep cleaning is less about speed and more about thoroughness. When you slow down, you notice the details that truly transform a space.

3. Refresh Fabrics and Soft Surroundings

Winter fabrics are often heavier and darker. Swap out thick blankets and pillow covers for lighter textures and softer colors. Even small changes can completely shift the mood of a room.

Wash curtains, table linens, and throw blankets. Clean fabrics carry a scent and softness that instantly signals a new beginning. Fresh linens on beds make evenings feel especially restful.

If you can, hang bedding outside to dry in the sunshine. There is something deeply satisfying about bringing in sheets that smell like fresh air. It feels simple, old fashioned, and wonderfully grounding.

4. Restock and Reorganize Your Pantry

A spring reset is not complete without tending to your kitchen. Check expiration dates, wipe down shelves, and reorganize dry goods so everything is visible and accessible. A tidy pantry makes daily cooking far less stressful.

Restock simple staples your family uses regularly. Fresh flour, rice, oats, baking supplies, and broth ingredients help you feel prepared and steady. When your pantry is full of basics, meal planning becomes much easier.

Consider preparing a few homemade staples this season. Bake fresh bread, start a new sourdough batch, or simmer bone broth for soups. These small rhythms anchor your homemaking in nourishment and care.

5. Reestablish Gentle Daily Rhythms

Winter can disrupt routines with holidays and shorter days. Spring is a natural time to revisit your daily flow and make small adjustments. A simple morning and evening routine brings calm to the entire household.

Begin your mornings by opening windows, making beds, and starting a load of laundry. Light a candle or play soft music while you prepare breakfast. These small habits set the tone for a peaceful day.

End the day with a ten minute tidy and preparation for tomorrow. Lay out clothes, check your meal plan, and clear the kitchen counters. Going to bed with order makes waking up feel hopeful instead of overwhelming.

6. Bring Beauty Back Into Your Home

After cleaning and organizing, add simple touches of beauty. A vase of fresh flowers, a bowl of lemons on the counter, or a stack of well loved books can warm a space. Beauty does not need to be expensive to be meaningful.

Rearrange furniture slightly if a room feels stagnant. Sometimes moving a chair closer to a window or clearing a corner creates surprising openness. Small shifts often produce the greatest sense of renewal.

Remember that your home reflects your heart. When you intentionally cultivate beauty, you also cultivate gratitude. A peaceful home nurtures everyone who walks through its doors.

Final Thoughts

A spring homemaking reset is not about achieving a magazine perfect home. It is about creating a space that supports your family and encourages peace. When your home feels ordered and refreshed, your mind and spirit often follow.

Move slowly and savor the process. Turn on music, involve your children, and work with gratitude instead of pressure. This season is an opportunity to begin again with gentleness and intention.

Spring reminds us that renewal is always possible. As you reset your home, may you also feel renewed in your calling as a homemaker.

Homemaking, Homemaking Lifestyle

13 Easter Homemaking Ideas for a Beautiful and Meaningful Spring Season

Mar 2, 2026 · Leave a Comment

Easter is one of the most refreshing seasons in the homemaker’s year. After the quiet stillness of winter, spring arrives with light, warmth, and new life. It’s the perfect time to refresh your home, re-center your heart, and create meaningful traditions with your family.

As homemakers, we have the opportunity to shape the atmosphere of our homes during holidays. Easter doesn’t have to be elaborate or expensive to be beautiful. With a few intentional choices, you can create a peaceful and memorable celebration rooted in warmth and simplicity.

Here are 13 Easter homemaking ideas to help you prepare your home and heart for the season.

1. Deep Clean and Refresh One Room

Choose one space in your home to give extra attention before Easter. Open the windows, wash curtains, wipe baseboards, and let in fresh air.

Even refreshing a single room can shift the entire atmosphere of your home. It signals a new season and creates a sense of renewal.

2. Decorate with Simple Spring Touches

You don’t need elaborate décor to make your home feel festive. A vase of fresh flowers, a bowl of pastel eggs, or a simple wreath on the door is enough.

Keep it light and uncluttered. Soft linens, natural textures, and gentle colors reflect the beauty of spring without overwhelming your space.

3. Plan a Special Easter Menu

Take time to thoughtfully plan your Easter meal. Whether it’s a simple brunch or a full Sunday dinner, planning ahead prevents stress.

Consider baking bread from scratch, preparing a favorite family dessert, or using heirloom recipes that feel meaningful and familiar.

4. Bake Something with Your Children

Invite your children into the kitchen to bake something special. Hot cross buns, sugar cookies, or sweet rolls are perfect for little helpers.

The memories made while measuring flour and stirring batter often matter more than the finished result.

5. Create a Holy Week Rhythm

Use the week leading up to Easter to slow down and revamp spiritually. Read moew Scripture together, have extra prayer time together, light a candle at dinner, etc..

Even small daily moments of intention can make Easter feel deeper and more grounded.

6. Prepare Easter Baskets Thoughtfully

Instead of filling baskets with excess candy, consider meaningful additions like books, small toys, art supplies, or practical items.

Thoughtful gifts communicate care without encouraging overconsumption.

7. Print and Display Easter Coloring Pages

Set up a small coloring station for your children during Holy Week. This gives them a quiet activity while you prepare meals or tidy the house.

Displaying their finished artwork adds a personal and joyful touch to your home.

Download my free printable Easter coloring pages here.

8. Declutter Before Decorating

Before bringing out seasonal décor, take time to remove unnecessary clutter. Clear countertops, tidy entryways, and simplify surfaces.

A clean foundation allows your Easter touches to shine.

9. Set a Beautiful Easter Table

You can create a lovely tablescape with what you already own. Layer neutral plates, cloth napkins, and simple centerpieces.

Even everyday dishes feel special when arranged with intention.

10. Prepare for Guests Early

If you are hosting, spread preparations throughout the week. Wash guest linens, clean bathrooms, and prep ingredients ahead of time.

Doing a little each day prevents last-minute overwhelm and helps you enjoy the celebration.

11. Start a New Family Tradition

Easter is a wonderful time to introduce a simple annual tradition. A sunrise walk, a special breakfast, or a thankful game can become something your children look forward to each year.

Traditions do not need to be complicated to be meaningful.

12. Spend Time Outdoors

Spring invites us outside. Take a family walk, plant flowers, or simply sit on the porch and enjoy the fresh air.

Enjoying nature during Easter reminds us of our Creator and how he makes all things new in his time. Take time to enjoy the beauty of renewal happening all around you.

13. Reflect and Reset as a Homemaker

Easter is not only a time to refresh your home but also your heart. Take a quiet moment to reflect on your routines, priorities, and mindset.

Ask yourself what needs simplifying. Consider what habits are serving your family well and which ones can be gently adjusted as you step into a new season.

Final Thoughts

Easter homemaking is not about perfection. It is about cultivating warmth, intention, and peace within your home. A few thoughtful touches, simple traditions, and steady preparation can transform the season into something more meaningful.

As you welcome spring, remember that renewal begins in small, faithful acts. Through your care, planning, and presence, your home can become a place of celebration, reflection, and quiet joy this Easter season.

Homemaking, Homemaking Lifestyle

Sewing Guide for Beginners

Mar 2, 2026 · Leave a Comment

Learning to sew is one of those timeless skills that feels both practical and deeply satisfying. There’s something special about mending a tear, stitching a simple apron, or creating something useful with your own hands. For the woman who desires a slower, more intentional life, sewing is a skill that supports both frugality and creativity.

If you’ve ever felt intimidated by sewing, you’re not alone. Many beginners assume it’s complicated or requires expensive tools and advanced knowledge. The truth is, sewing can be simple when you start with the basics and build gradually.

This beginner’s guide to sewing will walk you through the foundational tools, skills, and projects you need to start confidently. You don’t need perfection — just a willingness to learn and practice.

Getting Started with Sewing

Sewing is simply the act of joining fabric together with thread. That’s it. At its core, it’s a straightforward skill that becomes more refined with practice.

Many beginners believe they need to master everything at once. You don’t. Start small. Expect uneven stitches, crooked seams, and a few mistakes. That’s how skill-building works. Hand sewing and machine sewing are both valuable, and while a sewing machine speeds things up, you can begin with basic hand stitching if that’s what you have.

Basic Sewing Supplies for Beginners

You do not need an elaborate craft room to begin sewing. A small collection of reliable tools will serve you well. Here are the essential tools you’ll need…

  • A sewing machine – More on this later…
  • Heavy duty fabric scissors – A good pair will last you for years.
  • Small Scissors – I love using these cute embroidery scissors for clipping threads. You could use your big pair, but it’s a little clunky and the ones in the kit or a bit flimsy.
  • Sewing Kit – includes all the little things like a thimble, seam ripper, etc for only $6!

As far as thread goes, the kit has some, but I recommend buying better quality thread at Walmart or Hobby Lobby. I recommend buying a coordinating spool of thread with each fabric you buy or project you plan to make. That way you’ll always have what you need on hand.

Nice-to-have extras include a rotary cutter and mat, an iron and ironing board, fabric marking tools (I honestly just use a pencil), and simple storage containers (Like a cute basket from an antique store!) to keep everything organized.

Where to Find a Sewing Machine

If you are just getting started, you do not need the newest or most expensive sewing machine to begin. Many excellent beginner machines can be found at affordable prices if you know where to look. Big box stores, craft stores, and online retailers often carry simple, mechanical machines that are perfect for learning basic stitches without overwhelming features.

Here are a few suggestions…

  • Refurbished Machine – I got a heavy duty Singer sewing machine from Walmart.
  • Brother’s Machine – This is what I would do if mine goes out. There are a bit cheaper and you’ll get a new machine.

Understanding Fabric

Fabric can feel overwhelming at first, but it becomes manageable once you understand a few basics. Cotton is one of the best fabrics for beginners because it won’t slip around while cutting or stitching.

Woven fabrics (like cotton and linen) hold their shape and are easier to control. Knit fabrics stretch and require a bit more experience. Starting with woven cotton allows you to focus on learning technique without fighting the fabric.

Always prewash your fabric before sewing. This prevents shrinking later and ensures your finished project holds its shape after laundering. Take time to cut carefully and follow the grain of the fabric for best results.

As far as purchasing fabric, you can buy online, but I prefer to see it and feel it in person. Hobby Lobby is my go to for finding fabric. They run sales every other week.

Sewing Machine Basics

Before starting a project, familiarize yourself with your machine. Learn the key parts: the spool pin, bobbin, presser foot, feed dogs, and stitch selector, etc. Watch a few YouTube videos to get the hang of it.

Practice threading your machine and winding a bobbin several times until it feels natural. Most sewing frustrations come from incorrect threading, so slow down and follow your machine’s manual carefully.

Begin by practicing straight stitches on scrap fabric. Learn how to backstitch at the beginning and end of seams to secure them. Adjusting tension may take trial and error, but don’t be discouraged — this is part of learning.

Essential Sewing Skills

Every beginner should master a few core skills. Sewing a straight seam with consistent seam allowance is foundational. Use the guide markings on your machine’s needle plate to help keep lines even.

Pressing seams with an iron after stitching makes a dramatic difference in the final result. However, pressing is optional despite what most people will say. If I had to iron every project I did, I wouldn’t sew.

Learn to finish raw edges with a zigzag stitch to prevent fraying. Practice simple hemming techniques and basic hand stitches like the running stitch and whip stitch. These skills will allow you to mend clothing and complete simple household projects.

Your First Simple Sewing Projects

Start with small, practical projects that build confidence. Here are a few to choose from…

15 Easy Things to Sew for Beginners

The goal of your first projects is not perfection — it’s progress. Each finished piece will strengthen your skills and grow your confidence.

Final Thoughts

Sewing is not about creating flawless garments on your first try. It’s about building a skill slowly and faithfully, one seam at a time. The more you practice, the more natural it becomes.

As a homemaker, sewing supports frugal living, creativity, and self-sufficiency. You don’t have to master everything today. Start with simple tools, basic fabric, and a small project. With patience and practice, you’ll be surprised at what your hands can create.

Handmade

How to Organize Your Life as a Homemaker

Mar 2, 2026 · Leave a Comment

Being a homemaker can feel overwhelming at times, especially when there’s always something that needs attention. From meal prep to laundry, errands, and household maintenance, the to-do list can seem never-ending. Learning how to organize your life as a homemaker is key to creating balance, reducing stress, and finding fulfillment in your daily routines.

Organization isn’t about perfection or keeping a spotless home at all times. It’s about creating systems that work for you, allowing you to prioritize what matters most. By building intentional habits, you can manage your household more efficiently while still leaving space for rest, creativity, and joy.

This post shares practical strategies for organizing your life as a homemaker. From daily structure to simplifying your environment, these tips will help you feel in control and supported in your homemaking journey.

Be at Home

Being physically and mentally present in your home is the first step to creating order. When you are intentional about spending time at home, you can focus on tasks without distraction and respond to your family’s needs more effectively.

Set boundaries with outside obligations and prioritize your time at home. Dedicating yourself to being at home automatically gives yourself space to organize and keep up with your homemaking responsibilities. Outings are not bad, but they can be distractions in very busy seasons like mothering with small children.

This is especially helpful if you have goals like…

  • cooking from scratch
  • creating a handmade home
  • baking bread

When you are consistently at home, it’s easier to organize your life and find what works for your household and supports the life you’re called to live.

Create a Daily Structure

A consistent daily structure helps you stay on top of household responsibilities without feeling overwhelmed. Plan your day with key blocks for chores, meals, family time, and personal care.

Even a simple framework, like morning routines, mid-day tasks, and evening wrap-ups, can make the day feel manageable. Structure gives your days rhythm and reduces decision fatigue.

Related Post: How to create your own daily routine

Use a Weekly Routine with Themed Days

Assigning themes to each day of the week helps you tackle tasks systematically. For example, Monday can be laundry day, Tuesday meal prep, Wednesday cleaning, and so on.

This approach simplifies planning and ensures all areas of your home are addressed regularly. Over time, it becomes an automatic rhythm that keeps your household running smoothly.

Related Post: Old Fashioned Weekly Routine

Create a Homemaking Binder

A homemaking binder is a simple but powerful tool to keep your household organized and your routines on track. By gathering schedules, cleaning checklists, meal plans, and important information in one place, you create a central hub that makes managing your home much easier. You can include sections for daily routines, weekly plans, seasonal tasks, budgeting, and even personal goals, so everything you need is accessible at a glance.

Start by choosing a sturdy binder and dividing it into sections that make sense for your lifestyle. Use clear sheet protectors for frequently referenced documents and add tabs for easy navigation. A homemaking binder not only keeps your home running smoothly but also gives you peace of mind, helping you feel in control and prepared for each day.

Related Post: How to create a homemaking binder

Declutter

Regularly decluttering your home frees up space and mental energy. Sort through items in each room, and keep only what you use and love.

Decluttering prevents clutter from piling up and creates a more serene environment. Small daily efforts can make a big difference in maintaining order.

Let Go of What Doesn’t Work

Not every method, tool, or routine will suit your lifestyle. Letting go of what doesn’t work prevents frustration and wasted effort.

Be honest with yourself about what brings value and what doesn’t. Simplifying your approach can make your homemaking more effective and enjoyable.

Be Okay with Messes

It’s normal for homes to get messy, especially with children or pets. Accepting temporary disorder allows you to stay calm and focused on what truly matters.

Don’t let the pursuit of perfection steal your peace. Embrace the ebb and flow of homemaking and focus on progress, not perfection.

Meditate Daily

Daily meditation or quiet reflection helps center your mind and reduce stress. Even a few minutes at some point through out the day can improve focus and clarity for the rest of the day.

Incorporate deep breathing, gratitude, or bible verse memorization and reflection into your routine. This practice enhances your ability to handle household challenges with patience and calm. Meditation is key to becoming a more virtuous woman.

Simplify Any Area of Life That No Longer Works

If a part of your routine or home setup causes stress or inefficiency, simplify it. Streamline your kitchen, meal planning, grocery shopping, reorganize storage, or adjust schedules to better suit your needs.

Simplicity creates space for joy and allows you to focus on meaningful tasks. Every small change contributes to a more organized and harmonious home.

Final Thoughts

Organizing your life as a homemaker is about creating systems that support you, not controlling every detail. By being present, building structure, and simplifying your environment, you can create a home that feels balanced and nurturing.

Embrace routines, let go of what doesn’t work, and be gentle with yourself when messes happen. With intentional habits and reflection on what matters most, homemaking can become a fulfilling and peaceful part of your life.

Homemaking, Homemaking Lifestyle

Garlic Olive Oil Sauce: A Simple, Flavorful Sauce You Can Make in Minutes

Mar 2, 2026 · Leave a Comment

Garlic olive oil sauce is one of the simplest and most versatile sauces you can make in your kitchen. With just a few basic ingredients, you can create a rich, aromatic sauce that transforms pasta, vegetables, bread, and even grilled meats. It’s proof that simple cooking often delivers the best flavor.

This sauce comes together quickly and requires very little prep work. Two cloves of fresh garlic, good-quality olive oil, and a few minutes over heat are all you need to build a deeply savory base. The key is gently sautéing the garlic until it turns lightly golden and fragrant without burning.

If you are looking for an easy homemade sauce that feels both rustic and elegant, this garlic olive oil sauce is a must-try. Below you’ll find the step-by-step method, helpful tips, equipment needed, and serving ideas.

Yield: 2 servings

Garlic Olive Oil Sauce

Garlic Olive Oil Sauce

Garlic olive oil sauce is a timeless kitchen staple that proves simple ingredients can create bold flavor. With just two cloves of garlic and half a cup of olive oil, you can make a sauce that elevates everyday meals in minutes.

Prep Time 5 minutes
Cook Time 5 minutes
Total Time 5 minutes

Ingredients

  • 2 cloves garlic
  • 1/2 cup olive oil

Instructions

    Heat 1/2 cup olive oil in a cast iron skillet over medium-low heat.
    Using a garlic press, crush 2 cloves of garlic directly into the skillet.
    Sauté the garlic in the olive oil for a few minutes, stirring gently.
    Cook until the garlic turns lightly golden brown and fragrant. Watch carefully to prevent burning.
    Remove the skillet from heat immediately to stop the cooking process.

Notes

Do not let the garlic darken too much, as it can become bitter.
For a milder flavor, remove from heat when the garlic is pale golden.
For a slightly nuttier flavor, allow it to brown just a bit more—carefully.

Toss with hot pasta.
Drizzle over roasted vegetables.
Brush onto homemade bread.
Spoon over grilled chicken or seafood.

Did you make this recipe?

Please leave a comment on the blog or share a photo on Pinterest

© Naomi Scott

Ingredients for Garlic Olive Oil Sauce

This garlic olive oil sauce uses only a handful of pantry staples, making it incredibly accessible. You will need 2 cloves of garlic and 1/2 cup of olive oil as your base.

Choose fresh garlic for the best flavor, and use a good-quality extra virgin olive oil if possible. Because there are so few ingredients, the quality of each one really shines through in the final result.

Equipment You Will Need

Having the right tools makes this sauce quick and stress-free to prepare. You will need a cast iron skillet, a garlic press, a measuring cup, and a spatula or wooden spoon.

A cast iron skillet works especially well because it distributes heat evenly and encourages gentle browning. The garlic press ensures the cloves are finely crushed, which allows them to release maximum flavor into the oil.

  • Small cast iron skillet
  • Garlic press
  • Measuring cup or you can eyeball the oil, too
  • Spatula or wooden spoon
  • Knife (to trim garlic ends if needed)

This post may contain affiliate links, which means I may earn a small commission at no extra cost to you if you choose to make a purchase. I only share products and tools that I personally use, love, or would genuinely recommend in my own kitchen. Thank you for supporting The Virtuous Home and helping me continue creating helpful, from-scratch recipes and homemaking resources for you.

How to Make Garlic Olive Oil Sauce

Start by heating 1/2 cup of olive oil in a cast iron skillet over medium-low heat. While the oil warms, crush 2 cloves of garlic using a garlic press directly into the skillet.

Sauté the garlic in the olive oil for a few minutes, stirring gently. Allow the garlic to turn lightly golden brown, but watch carefully to prevent burning. Once fragrant and browned, remove the skillet from heat to stop the cooking process.

Tips for Perfect Garlic Flavor

The most important step in this recipe is controlling the heat. Garlic can quickly go from golden to burnt, so keeping the heat at medium-low ensures even cooking and prevents bitterness.

If you prefer a milder garlic flavor, remove the skillet from the heat as soon as the garlic turns pale golden. For a deeper, nuttier taste, allow it to brown slightly more—but always keep a close eye on it.

Ways to Use Garlic Olive Oil Sauce

Garlic olive oil sauce is incredibly versatile. Toss it with freshly cooked pasta and a sprinkle of Parmesan cheese for a quick and satisfying meal.

You can also drizzle it over roasted vegetables, brush it onto homemade bread, or spoon it over grilled chicken or shrimp. Its simple flavor enhances nearly any savory dish without overpowering it.

Final Thoughts

Garlic olive oil sauce is a timeless kitchen staple that proves simple ingredients can create bold flavor. With just two cloves of garlic and half a cup of olive oil, you can make a sauce that elevates everyday meals in minutes.

Keep this recipe in your back pocket for busy evenings or when you need a quick finishing touch. Once you master this basic method, you’ll find yourself reaching for it again and again to add warmth, richness, and depth to your cooking.

Recipes

27 Delicious Sourdough Dessert Recipes

Mar 2, 2026 · Leave a Comment

If you keep a sourdough starter on your counter, you already know how quickly discard can accumulate. Instead of tossing it out, you can turn that tangy, bubbly starter into rich, flavorful desserts. Sourdough dessert recipes are a wonderful way to reduce waste while adding depth of flavor to your baking.

The slight tang from sourdough enhances sweetness and balances rich ingredients like chocolate, butter, and brown sugar. It also contributes to tender textures in cakes, muffins, and cookies. Whether you are using active starter or discard, there are countless creative ways to incorporate it into your dessert menu.

Below are 27 sourdough dessert recipes that are perfect for everything from simple weeknight treats to special occasions. Each one helps you make the most of your starter while creating something truly delicious.

1. Sourdough Chocolate Chip Cookies

Sourdough chocolate chip cookies are soft, chewy, and full of rich flavor. The starter adds a subtle tang that enhances the sweetness of the chocolate.

You can use discard straight from the refrigerator, making this a convenient recipe. Letting the dough rest before baking deepens the flavor even more.

Get the recipe Here!

2. Sourdough Pumpkin Bread

Sourdough pumpkin bread is warmly spiced and incredibly moist. The starter complements pumpkin’s earthy sweetness.

This loaf is perfect for fall baking. Add chopped nuts for added crunch.

Get the recipe Here!

3. Sourdough Cinnamon Rolls

Sourdough cinnamon rolls are fluffy, soft, and packed with warm spice. The natural fermentation adds complexity to the sweet dough.

Top with cream cheese frosting for a classic finish. These rolls are perfect for holidays or weekend mornings.

Get the recipe Here!

4. Sourdough Banana Bread

Sourdough banana bread combines overripe bananas with tangy starter for a moist, flavorful loaf. The result is tender with just the right balance of sweet and tangy.

Add chocolate chips or chopped nuts for extra texture. This is an easy and comforting bake.

Get the recipe Here!

5. Sourdough Pancakes

Sourdough pancakes are light, fluffy, and slightly tangy. They cook up golden and pair beautifully with maple syrup.

This recipe works well with discard and can be mixed quickly. It’s ideal for a simple dessert-style breakfast or brunch treat.

Get the recipe Here!

6. Sourdough Waffles

Sourdough waffles have crisp edges and soft centers. The fermentation gives them a deeper flavor than standard waffle batter.

Serve with fresh berries and whipped cream for a dessert twist. They also freeze well for later use.

Get the recipe Here!

7. Sourdough Chocolate Cake

Sourdough chocolate cake is rich, moist, and deeply flavorful. The starter enhances the cocoa without overpowering it.

This cake works beautifully for layered birthday cakes or simple sheet cakes. Frost with chocolate buttercream for an extra indulgent treat.

Get the recipe Here!

8. Sourdough Carrot Cake

Sourdough carrot cake is tender and perfectly spiced. The starter complements the warm cinnamon and nutmeg flavors.

Cream cheese frosting adds a classic finish. This cake is ideal for spring gatherings or holidays.

Get the recipe Here!

9. Sourdough Blueberry Muffins

Sourdough blueberry muffins are soft, fluffy, and bursting with fruit. The starter adds moisture and a gentle tang.

Sprinkle coarse sugar on top before baking for a bakery-style finish. These muffins are perfect for snacking or dessert.

Get the recipe Here!

10. Sourdough Lemon Loaf

Sourdough lemon loaf is bright, moist, and refreshing. The tangy starter pairs beautifully with fresh lemon zest and juice.

A simple glaze on top enhances the citrus flavor. This dessert feels light yet satisfying.

Get the recipe Here!

11. Sourdough Apple Crisp

Sourdough apple crisp features a sweet apple filling topped with a buttery sourdough crumble. The starter enriches the topping with subtle complexity.

Serve warm with ice cream for a cozy dessert. It’s perfect for fall evenings.

Get the recipe Here!

12. Sourdough Coffee Cake

Sourdough coffee cake is soft and tender with a cinnamon streusel topping. The starter helps create a moist crumb.

This dessert pairs perfectly with a hot cup of coffee. It’s great for brunch or afternoon gatherings.

Get the recipe Here!

13. Sourdough Sugar Cookies

Sourdough sugar cookies are soft and lightly tangy. They roll out well for cut-out shapes.

Decorate with royal icing for holidays or special occasions. The flavor is slightly more complex than traditional sugar cookies.

Get the recipe Here!

14. Sourdough Snickerdoodles

Sourdough snickerdoodles are chewy and coated in cinnamon sugar. The starter enhances the warm spice flavor.

These cookies are simple yet comforting. They make a wonderful addition to any dessert tray.

Get the recipe Here!

15. Sourdough Donuts

Sourdough donuts are soft and fluffy with a slight tang. They can be fried or baked depending on your preference.

Glaze or coat in cinnamon sugar for a classic finish. Homemade donuts feel extra special.

Get the recipe Here!

16. Sourdough Crepes

Sourdough crepes are thin, delicate, and versatile. The tang adds depth without overwhelming sweet fillings.

Fill with fruit and whipped cream for a light dessert. They also work beautifully with chocolate or jam.

Get the recipe Here!

17. Sourdough Cheesecake Crust

Sourdough discard can be used to make a unique cheesecake crust. The tang balances the rich cream cheese filling.

Bake until golden before adding the filling. This twist adds subtle complexity to a classic dessert.

Get the recipe Here!

18. Sourdough Peach Cobbler

Sourdough peach cobbler features juicy peaches topped with a tender sourdough biscuit layer. The flavor combination is comforting and nostalgic.

Serve warm with vanilla ice cream. It’s especially lovely in summer.

Get the recipe Here!

19. Sourdough Oatmeal Cookies

Sourdough oatmeal cookies are chewy with hearty texture. The starter enhances the nutty oats and brown sugar.

Add raisins or chocolate chips for variety. These cookies are simple and satisfying.

Get the recipe Here!

20. Sourdough Focaccia with Sweet Toppings

Sweet sourdough focaccia can be topped with sugar, berries, or honey. The soft, airy texture makes it ideal for dessert-style baking.

Drizzle with glaze after baking for extra sweetness. It’s a creative way to use active starter.

Get the recipe Here!

21. Sourdough Cupcakes

Sourdough cupcakes are moist and tender with balanced sweetness. The starter adds depth without overpowering classic flavors like vanilla or chocolate.

Top with buttercream frosting for a celebratory treat. These are perfect for parties.

Get the recipe Here!

22. Sourdough Brownies

Sourdough brownies are fudgy and decadent with a slight depth that sets them apart from traditional brownies. The starter helps create a moist, tender crumb.

This recipe is a great way to use up extra discard. Pair with vanilla ice cream for an indulgent dessert.

Get the recipe Here!

23. Sourdough Churros

Sourdough churros are crispy on the outside and soft inside. The starter gives them a subtle tang.

Roll in cinnamon sugar and serve with chocolate sauce. They make a fun and unique dessert.

Get the recipe Here!

24. Sourdough Blondies

Sourdough blondies are rich and buttery with hints of caramel from brown sugar. The starter enhances their chewy texture.

Add white chocolate chips or nuts for variation. They are easy to slice and serve.

Get the recipe Here!

25. Sourdough Berry Cobbler

Sourdough berry cobbler combines sweet berries with a tender sourdough topping. The tartness of the starter pairs beautifully with juicy fruit.

Bake until bubbly and golden. It’s an effortless crowd-pleaser.

Get the recipe Here!

26. Sourdough Ice Cream Sandwich Cookies

Use sourdough cookies to create homemade ice cream sandwiches. The slight tang balances sweet ice cream perfectly.

Freeze until firm before serving. This dessert is especially fun for summer.

Get the recipe Here!

27. Sourdough Sticky Buns

Sourdough sticky buns are soft, sweet, and topped with caramelized brown sugar and nuts. The fermentation enhances the richness of the dough.

Serve warm for the best texture and flavor. These buns are a show-stopping dessert.

Get the recipe Here!

Final Thoughts

Sourdough dessert recipes offer a creative and delicious way to use up your starter. From cookies and cakes to cobblers and sweet breads, the possibilities are nearly endless. The subtle tang and tender texture make these treats stand out from traditional recipes.

If you bake with sourdough regularly, keeping a list of dessert ideas on hand ensures nothing goes to waste. Try a few of these recipes and discover just how versatile your sourdough starter can be in the world of sweet baking.

Sourdough

7 Denim Bag Patterns You Can Sew for Everyday Style and Function

Mar 2, 2026 · Leave a Comment

Denim is one of the most versatile fabrics you can sew with, especially when it comes to bags. It is durable, structured, and timeless, making it perfect for everyday use. Whether you are repurposing old jeans or working with yardage, denim bag patterns offer both style and practicality.

Sewing your own denim bag allows you to customize the size, shape, and details to suit your needs. You can add pockets, lining, zippers, or decorative stitching to create something truly unique. Denim also pairs beautifully with cotton prints, canvas, and even leather accents.

If you are looking for functional projects that feel modern yet sturdy, these 7 denim bag patterns are excellent choices. Each one is practical, beginner-friendly to intermediate in skill, and perfect for everyday life.

1. Lined Hobo Bag

A lined hobo bag is a relaxed, slouchy design that works beautifully in denim. The soft curve of the bag combined with the sturdy fabric creates a casual yet polished look.

Adding a cotton lining gives the bag structure and helps hide interior seams. You can also include an inside pocket for keys or a phone, making it both stylish and functional.

Lined Hobo Bag Tutorial

2. Shoulder Bag

A denim shoulder bag is a classic option that never goes out of style. With a structured body and comfortable strap length, it sits neatly under your arm for everyday errands.

You can keep the design simple with a magnetic snap closure or add a zipper for extra security. Decorative topstitching in contrasting thread gives it that signature denim look.

Shoulder Bag Tutorial

3. DIY Handbag

A DIY denim handbag can be as structured or soft as you prefer. By using interfacing, you can create a more polished shape that holds its form well.

This type of bag is perfect for adding small design details like pockets, button accents, or even repurposed jean pockets. It’s a great project for transforming old denim into something completely new.

DIY Handbag

4. Crossbody Bag

A denim crossbody bag is ideal for hands-free convenience. The adjustable strap makes it practical for busy days when you need easy access to essentials.

Because crossbody bags are often smaller, they are a manageable sewing project for beginners. Add a zipper closure and interior lining to create a durable everyday accessory.

Crossbody Bag Tutorial

5. Tote

A denim tote is one of the simplest and most useful bag patterns you can sew. With straight seams and sturdy handles, it is perfect for groceries, library books, or daily essentials.

Denim provides the strength needed to carry heavier items. Reinforcing the straps and adding boxed corners at the bottom gives the tote extra durability and shape.

Tote Tutorial

6. Patchwork Tote

A patchwork tote is a creative way to use denim scraps or old jeans in various washes. Combining light and dark denim pieces adds texture and visual interest.

This pattern allows you to experiment with piecing techniques while still creating a practical bag. The result is a one-of-a-kind accessory full of character and charm.

Patchwork Tote

7. Beach Bag

A denim beach bag is both stylish and sturdy enough for towels, sunscreen, and summer essentials. Its durability makes it ideal for carrying heavier items without worrying about wear and tear.

You can line the bag with bright cotton fabric for a cheerful interior. Large exterior pockets, especially repurposed jean pockets, add functionality and a fun design element.

Beach Bag Tutorial

Final Thoughts

Denim bag patterns are practical, durable, and endlessly customizable. Whether you prefer a relaxed hobo style or a structured crossbody, denim offers strength and timeless appeal for everyday use. Repurposing old jeans also makes these projects budget-friendly and sustainable.

Start with a simple tote or shoulder bag if you are new to sewing bags, then work your way up to more detailed designs. With each project, you will gain confidence and create functional pieces that combine style and handmade craftsmanship.

Handmade

9 DIY Clothes Patterns (Plus How to Clone Your Clothes)

Mar 2, 2026 · Leave a Comment

Sewing your own clothes is one of the most rewarding skills you can learn. Not only does it allow you to create pieces that fit your body beautifully, but it also gives you full control over fabric choices, colors, and overall style. With the right DIY clothes patterns, you can build a wardrobe that feels both personal and practical.

The good news is that you do not need complicated commercial patterns to get started. Many beginner-friendly clothing projects use simple shapes, elastic waistbands, and forgiving silhouettes. Once you understand the basics, you can customize each piece to suit your preferences.

Below are 9 DIY clothes patterns that are approachable, versatile, and perfect for building confidence at your sewing machine. As a bonus, you’ll also learn how to clone your clothes so you can recreate your favorite garments again and again.

1. Dress

A simple dress pattern is a staple in any DIY wardrobe. Beginner-friendly dress designs often feature straight seams, elastic waists, or loose silhouettes that are easy to fit and sew.

You can customize a dress by adjusting the sleeve length, hemline, or neckline. Choose breathable cotton for everyday wear or a flowy fabric for a more elevated look.

How to Sew a Dress without a Pattern

2. PJ Pants

PJ pants are one of the easiest clothing patterns to sew. With an elastic waistband and straight legs, they come together quickly and require minimal fitting.

Soft flannel or lightweight cotton makes them especially comfortable. Once you make one pair, you’ll likely want several in different prints.

Pajama Pants Tutorial

3. T-Shirt

A basic T-shirt is a wardrobe essential and a great introduction to sewing with knit fabrics. A simple pattern includes a front piece, back piece, and sleeves, along with a neckband.

Stretchy jersey fabric allows for comfort and ease of movement. Practice makes perfect when working with knits, and a T-shirt is an ideal starting point.

T-shirt Tutorial

4. Patchwork Skirt

A patchwork skirt is perfect for using fabric scraps and creating a one-of-a-kind piece. By sewing together panels or squares, you can design a colorful, textured skirt with personality.

An elastic waistband keeps the construction simple and comfortable. This project blends creativity with basic sewing techniques.

Patchwork Skirt Tutorial

5. Maxi Skirt

A maxi skirt is stylish, comfortable, and surprisingly simple to sew. Most patterns require just a few panels of fabric and an elastic waistband.

Lightweight fabrics like rayon or cotton voile create beautiful movement. Maxi skirts are easy to dress up or down, making them a versatile addition to your handmade wardrobe.

Maxi Skirt Tutorial

6. Tank Top

A tank top is another beginner-friendly knit project. With minimal seams and simple shaping, it’s quick to cut and sew.

Layer it under cardigans or wear it alone in warmer months. Once you master the basic pattern, you can experiment with different necklines and strap widths.

Tank Top Tutorial

7. PJ Shorts

PJ shorts are even quicker to sew than pajama pants. The construction is nearly identical but with shorter legs, making them a great weekend project.

They are comfortable, customizable, and ideal for warmer weather. Add pockets if you want an extra functional detail.

Pajama Shorts Tutorial

8. Long Sleeve Shirt

A long sleeve shirt builds on the same principles as a basic T-shirt but adds extended sleeves for cooler seasons. This pattern helps you refine your skills with knit fabrics and sleeve insertion.

Choose cozy jersey or lightweight sweater knit for a comfortable fit. Once finished, you’ll have a practical layering piece made entirely by you.

Long Sleeve Shirt Tutorial

9. Shirred Dress

A shirred dress uses elastic thread in the bobbin to create gathered, stretchy sections at the bodice. This technique eliminates the need for zippers and complex closures.

Shirred dresses are flattering and forgiving in fit. They are especially popular for summer and can be made in a variety of lengths and sleeve styles.

Shirred Dress Tutorial

Bonus: How to Clone Your Clothes

Learning how to clone your clothes allows you to recreate garments you already love. Instead of taking apart the original piece, you can fold it carefully and trace around it onto pattern paper, adding seam allowances as you go.

This method works especially well for simple garments like T-shirts, skirts, and pajama pants. Cloning your favorite clothes helps you refine fit and create a handmade wardrobe tailored exactly to your preferences.

How to Clone your Clothes

Final Thoughts

Sewing your own clothing does not have to be intimidating. With these 9 DIY clothes patterns, you can begin building a wardrobe that is comfortable, customizable, and uniquely yours. Starting with simple silhouettes and elastic waistbands builds confidence and practical skills.

As you gain experience, you can adjust patterns, experiment with fabrics, and even clone your favorite pieces. Handmade clothing brings creativity into everyday life, and each finished garment is a reminder of what you can create with your own two hands.

Handmade

7 Chicken Sewing Patterns (Free Printable Included)

Mar 2, 2026 · Leave a Comment

If you love farmhouse style, spring decor, or whimsical handmade touches, chicken sewing patterns are such a delightful place to start. From sweet little felt chicks to patchwork hens, these projects add personality and warmth to your home. They also make thoughtful seasonal decorations and handmade gifts.

Chicken-themed sewing projects are wonderfully versatile. You can use scraps from your fabric stash, experiment with patchwork, or try working with felt for a softer, more playful look. Many of these patterns are beginner-friendly while still being enjoyable for more experienced sewists.

Below are 7 chicken sewing patterns that are perfect for Easter decorating, kitchen accents, baskets, and cheerful handmade touches throughout the year. Each project brings its own charm and creative possibilities.

1. DIY Felt Easter Chick

A DIY felt Easter chick is a sweet and simple project that works beautifully for spring decorating. Using soft yellow felt, you can stitch together a small chick shape, lightly stuff it, and add embroidered eyes and a tiny orange beak.

These little chicks look adorable tucked into Easter baskets or displayed on a tiered tray. Because felt doesn’t fray, this project is especially beginner-friendly and can even be hand-stitched with basic sewing skills.

Felt Chicken Tutorial

2. Chicken, Chick, and Egg Pattern

A chicken, chick, and egg pattern gives you a full farm-inspired set in one project. You can create a mother hen, a tiny chick, and coordinating fabric eggs using complementary prints.

This type of pattern is perfect for seasonal displays or children’s play sets. Mixing different fabrics for each piece adds visual interest and gives you the opportunity to use leftover scraps in a creative way.

Chicken, Chick, and Egg Pattern

3. Chicken Ornament

A chicken ornament is a charming addition to spring decor or even a farmhouse-style Christmas tree. Sew two small chicken-shaped pieces together, stuff lightly, and add a ribbon loop at the top.

These ornaments also make lovely handmade gifts. Choose gingham, floral, or vintage-inspired prints to match your home’s aesthetic and personalize them with simple embroidery details.

Chicken Ornament Tutorial

4. Rooster Basket

A rooster basket is both decorative and functional. This pattern features a structured body with a handle, allowing you to use it for holding eggs, mail, or small household items.

Bold fabrics in reds, blues, and farmhouse prints bring the rooster to life. This project may require slightly more sewing experience, but the finished basket makes a statement piece in any country kitchen.

Rooster Basket Tutorial

5. Patchwork Chicken

A patchwork chicken is perfect for using up fabric scraps from previous projects. By piecing together small squares or strips, you can create a colorful, textured chicken body full of personality.

Patchwork chickens look beautiful displayed on open shelving or as part of a seasonal centerpiece. Each one turns out unique, making this a fun project to repeat with different color combinations.

Patchwork Chicken Tutorial

6. Chicken Basket

A chicken basket combines whimsy and practicality. Similar to a soft fabric bowl, this design features a chicken-shaped exterior with space inside for holding eggs, sewing supplies, or small treats.

This project works well with sturdy cotton fabrics and interfacing to help maintain its shape. It’s especially charming during spring and Easter, but it can easily stay out year-round in a farmhouse-style home.

Chicken Basket Tutorial

7. Cheery Fabric Chicken

The cheery fabric chicken is all about bright colors and playful design. With rounded shapes, contrasting wings, and simple stitched features, this project brings a lighthearted feel to your decor.

These fabric chickens are perfect for decorating kitchen counters, bookshelves, or children’s rooms. Make a few in coordinating fabrics to create a cheerful flock that adds warmth and handmade charm to your space.

Cherry Fabric Chicken

Final Thoughts

Chicken sewing patterns are a delightful way to add farmhouse charm and seasonal decor to your home. Whether you prefer simple felt projects or more detailed patchwork designs, there is something here for every skill level. These projects are also a wonderful opportunity to use fabric scraps and experiment with color combinations.

Try starting with one pattern that matches your current sewing confidence, then gradually expand your collection. Before long, you may have a cheerful flock of handmade chickens bringing personality and warmth to your home all year round.

Handmade

15 Cottage Cheese Breakfast Recipes

Mar 2, 2026 · Leave a Comment

Cottage cheese has made a major comeback, and for good reason. It’s affordable, high in protein, incredibly versatile, and easy to work into simple, wholesome breakfasts. Whether you prefer sweet flavors in the morning or lean toward savory dishes, cottage cheese can adapt to almost any craving.

One of the best things about cottage cheese breakfast recipes is how quickly they come together. Many require little to no cooking, which makes them perfect for busy mornings at home. At the same time, cottage cheese can also be baked or blended into more filling meals that feel hearty and satisfying.

If you’re looking for new ways to use this nutritious staple, here are 15 cottage cheese breakfast recipes that are easy, delicious, and perfect for starting your day well.

1. Cottage Cheese and Fresh Fruit Bowl

A simple cottage cheese and fruit bowl is one of the easiest breakfasts you can prepare. Spoon cottage cheese into a bowl and top with fresh berries, sliced peaches, or pineapple.

The natural sweetness of the fruit pairs beautifully with the creamy texture of cottage cheese. Add a drizzle of honey or a sprinkle of granola for extra flavor and crunch.

2. Cottage Cheese Toast

Spread cottage cheese over toasted sourdough bread for a protein-rich base. Top with sliced tomatoes, avocado, or even a poached egg for a savory option.

For a sweet variation, add sliced strawberries and a drizzle of honey. This quick breakfast feels elevated but takes only minutes to assemble.

3. Cottage Cheese Smoothie

Blend cottage cheese with frozen fruit, milk, and a handful of spinach for a creamy, high-protein smoothie. The cottage cheese adds thickness and keeps you full longer.

This is a great option for busy mornings when you need something portable. It’s also an easy way to sneak in extra nutrients without sacrificing flavor.

4. Cottage Cheese Pancakes

Cottage cheese pancakes are light, fluffy, and packed with protein. Mix cottage cheese with eggs, a little flour, and baking powder to create a simple batter.

Cook in a skillet until golden and serve with fresh fruit or maple syrup. These pancakes feel indulgent but are surprisingly nourishing.

5. Savory Cottage Cheese Breakfast Bowl

Create a savory breakfast bowl by topping cottage cheese with cherry tomatoes, cucumber, green onions, and a drizzle of olive oil. Add salt and pepper to taste.

For extra protein, include a soft-boiled egg or smoked salmon. This refreshing combination is filling without feeling heavy.

6. Cottage Cheese Scramble

Add cottage cheese to scrambled eggs for a creamier texture and extra protein. Simply stir a few spoonfuls into the eggs as they cook.

The result is fluffy, rich scrambled eggs that feel more substantial. Serve with sourdough toast or sautéed vegetables for a complete breakfast.

7. Cottage Cheese Overnight Oats

Mix cottage cheese into your overnight oats for added creaminess and nutrition. Combine oats, milk, cottage cheese, fruit, and honey then refrigerate overnight.

In the morning, stir and top with fruit or nuts. This make-ahead breakfast is perfect for meal prepping.

8. Cottage Cheese and Banana Parfait

Layer cottage cheese with sliced bananas and a sprinkle of cocoa for a naturally sweet breakfast. Add chopped nuts or peanut butter for extra flavor.

This quick recipe is satisfying and packed with protein and potassium. It’s a simple option that requires no cooking at all.

9. Cottage Cheese Breakfast Wrap

Spread cottage cheese onto a tortilla and top with scrambled eggs, spinach, and shredded cheese. Roll tightly and enjoy warm.

This wrap is easy to customize and works well for on-the-go mornings. You can even make several in advance and reheat them during the week.

10. Cottage Cheese Muffins

Incorporate cottage cheese into muffin batter for added moisture and protein. It works especially well in blueberry or banana muffins.

These muffins make a convenient grab-and-go breakfast. Pair one with fruit or yogurt for a balanced meal.

Blueberry Cottage Cheese Muffin Recipe

11. Cottage Cheese Chia Pudding

Blend cottage cheese until smooth and mix with chia seeds and a splash of milk. Let it sit in the refrigerator for several hours until thickened.

Top with berries or coconut flakes before serving. This pudding is creamy, satisfying, and packed with nutrients.

Cottage Cheese Chia Seed Pudding

12. Cottage Cheese Breakfast Quesadilla

Spread cottage cheese and scrambled eggs onto one tortilla and top with another tortilla. Cook in a skillet until golden and melted.

Slice into wedges and serve with salsa or avocado. It’s a warm, comforting breakfast that comes together quickly.

Healthy Breakfast Quesadilla

13. Cottage Cheese Stuffed Crepes

Fill thin crepes with lightly sweetened cottage cheese and fresh fruit. Roll or fold them neatly and dust with powdered sugar if desired.

These feel elegant but are surprisingly simple to prepare. They’re perfect for a special breakfast at home.

Crepe recipe

14. Cottage Cheese Protein Bowl with Nut Butter

Combine cottage cheese with a spoonful of almond or peanut butter and top with sliced apples. Sprinkle with cinnamon for warmth.

This protein-packed bowl keeps you satisfied for hours. It’s especially helpful on mornings when you need sustained energy.

15. Baked Cottage Cheese Breakfast Casserole

Mix cottage cheese with eggs, vegetables, and shredded cheese, then bake until set. This casserole can be prepared ahead and reheated throughout the week.

It’s ideal for feeding a family or meal prepping for busy mornings. Slice into portions and store in the refrigerator for quick breakfasts.

Cottage Cheese Egg Bake

Final Thoughts

Cottage cheese breakfast recipes are a simple way to add more protein and nutrition to your mornings. Whether blended into smoothies, baked into casseroles, or enjoyed fresh with fruit, cottage cheese is incredibly versatile and easy to work with.

Try rotating a few of these recipes throughout the week to keep breakfast interesting and satisfying. With so many delicious options, cottage cheese might just become your new favorite morning staple.

Recipes

  • « Go to Previous Page
  • Go to page 1
  • Go to page 2
  • Go to page 3
  • Go to page 4
  • Go to page 5
  • Interim pages omitted …
  • Go to page 11
  • Go to Next Page »

Primary Sidebar

New Posts

Whipped Cream Recipe

Homemade whipped cream is one of those simple touches that can elevate even the most basic dessert. Light, airy, it comes together in minutes and tastes far better than anything store-bought. Whether you’re topping fresh berries, pies, or a cup of coffee, this classic recipe is a staple worth keeping on hand. Prep Time: 5 minutesTotal…

Read On →

Cucumber Sandwiches

Cucumber sandwiches are a simple, refreshing option that feels both light and timeless. With a creamy, savory filling and crisp cucumber, they’re perfect for warm days, quick lunches, or a charming addition to a simple gathering. This easy recipe comes together in minutes using pantry staples, making it a lovely go-to when you want something…

Read On →

A Simple Summer Routine for Homemakers

Summer is a season that invites warmth, sunshine, and a slower pace in the home. For homemakers, it’s the perfect opportunity to simplify daily routines while still keeping the household organized, welcoming, and peaceful. A simple summer routine allows you to enjoy long, sunny days, spend more time outdoors, and embrace the small joys of everyday life…

Read On →

Simple Summer Homemaking Rhythms

Summer is a season that invites warmth, light, and a slower pace in the home. The long days and sunny afternoons make it the perfect time to enjoy simple routines that keep the household running smoothly without feeling overwhelming. By establishing simple summer homemaking rhythms, you can maintain a clean, organized, and welcoming home while still…

Read On →

How to Make a Pillow Cover

Want to make a simple pillow cover? Here’s a pattern for a DIY pillow cover that has a simple border around it. If you are looking to sew a pillow cover for any size pillow then this is for you. This is a basic pattern that is made to fit any throw pillow that you…

Read On →

How to Create a Spring Homemaking Binder

Spring is a natural time to refresh not only your home but also your homemaking systems. As the weather warms and the days grow longer, many homemakers feel motivated to clean, organize, and prepare their homes for a new season. One simple way to stay organized during this busy time is by creating a spring…

Read On →

Old-Fashioned Homemaker’s Spring Checklist

Spring has long been a season of renewal in the home. As the days grow longer and the weather begins to warm, many homemakers feel the natural desire to refresh routines, enjoy lighter meals, and bring a little beauty indoors. An old-fashioned spring checklist doesn’t have to be complicated. Instead, it focuses on simple, meaningful…

Read On →

Sourdough Discard Naan

Sourdough discard naan is a simple and delicious way to use up extra sourdough starter. These soft, fluffy flatbreads cook quickly in a skillet and have a light tangy flavor from the discard. They’re perfect for serving alongside your favorite meals, dipping into sauces, or using as an easy wrap for lunch or dinner. Ingredients…

Read On →

  • About
  • Homemaking
  • Healthy Living
  • Free Resource Library
  • Home

Copyright © 2026 The Virtuous Home on the Seasoned Pro Theme