
Looking to add a custom touch to your bathroom? Learning how to make a shower curtain is an easy beginner-friendly sewing project that brings both beauty and function into your home. With just a few basic supplies and simple seams, you can create a curtain that perfectly fits your style and space.
Supplies You’ll Need
- Fabric (cotton, linen, or a cotton blend works well)
- Matching thread
- Sewing machine
- Fabric scissors or rotary cutter
- Measuring tape
- Iron and ironing board
- Buttonhole foot (optional, but helpful)
Step-by-Step: How to Sew a Shower Curtain
1. Measure Your Space
Start by measuring the width and height of your shower area. Standard shower curtains are typically around 72” x 72”, but always measure to ensure the best fit for your space.
My shower is tall and narrow so I measured the width and used 1 ½ of that measurement for plenty of coverage and a beautiful drape adding 2 inches for the side hems.
For the length, I measured from the top of the curtain rod straight down the wall to the floor of the shower. I added an additional 3 1/2 inches for a 1 inch hem on the bottom and a large 2 ½ inch hem at the top for the button holes.
I recommend ordering fabric online because you can get the width twice the length of fabric in store at most craft stores like Hobby Lobby. If you don’t, you can also just cut and piece together enough yardage to make up the width.
I used about 3 yards from a double width bolt, but you could get by with 6 yards of regular width and piece it together.
2. Wash and Dry Your Fabric
Pre-wash and dry your fabric to prevent shrinking later. I opted for a washable cotton fabric and since cotton shrinks the first time it goes through the dryer, you have to pre-shrink it before cutting.
3. Cut Your Fabric
Cut your fabric according to your measurements.
4. Sew the Side and Bottom Hems
Fold each side edge over 1/4 inch, fold it over again and sew it down. You can iron it, pin the whole side down, or simply roll the hem as you go.
5. Sew the Top Hem
Fold the top edge down 1/4 inch, press, then fold again about 1 inch and press. Stitch across the bottom of the fold to create a reinforced top section.
Note: Cotton fabric creases easily so if you don’t have an iron handy, you can also crease the sections down.
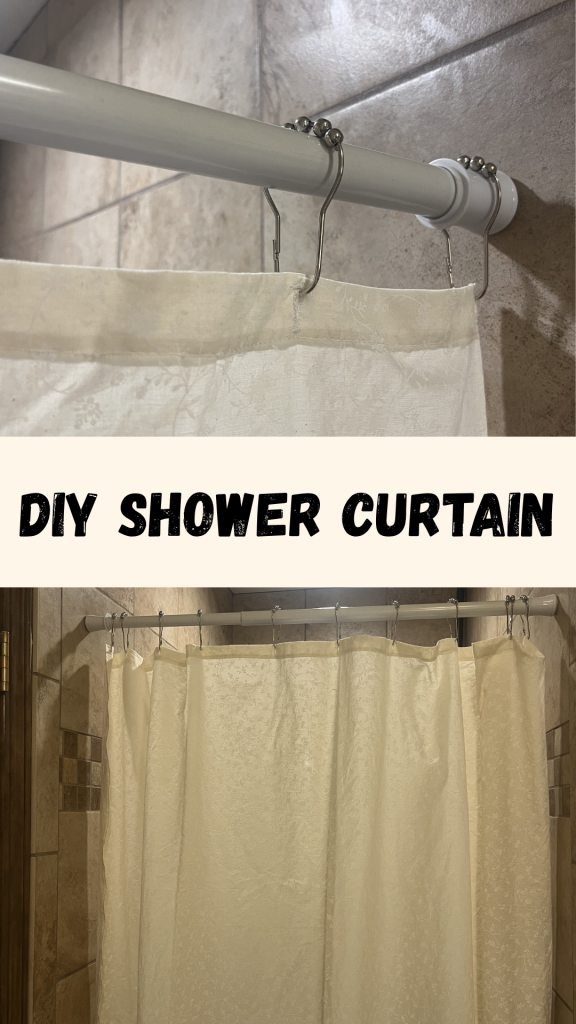
7. Sew Buttonholes
Measure and mark evenly spaced placements across the top hem (typically 10–12 holes. I just did however many curtain rings I had and evenly spaced them out, and marked on the backside of the reinforced hem.). Use your sewing machine’s buttonhole setting to create each opening for your curtain rings.
When I went to use the test my button hole foot, it didn’t work. I have a second hand machine so I’m not surprised it didn’t work. Instead I opted to use a special stitch that did several stitches right next to each other and sewed a rectangle.

I back stitched several times at the beginning of the stitch as well as the top and bottom sections of the stitch for extra reinforcements.

Then I used my scissors to snip a hole. I didn’t cut the whole section out, just one snip so I could insert the curtain rings.
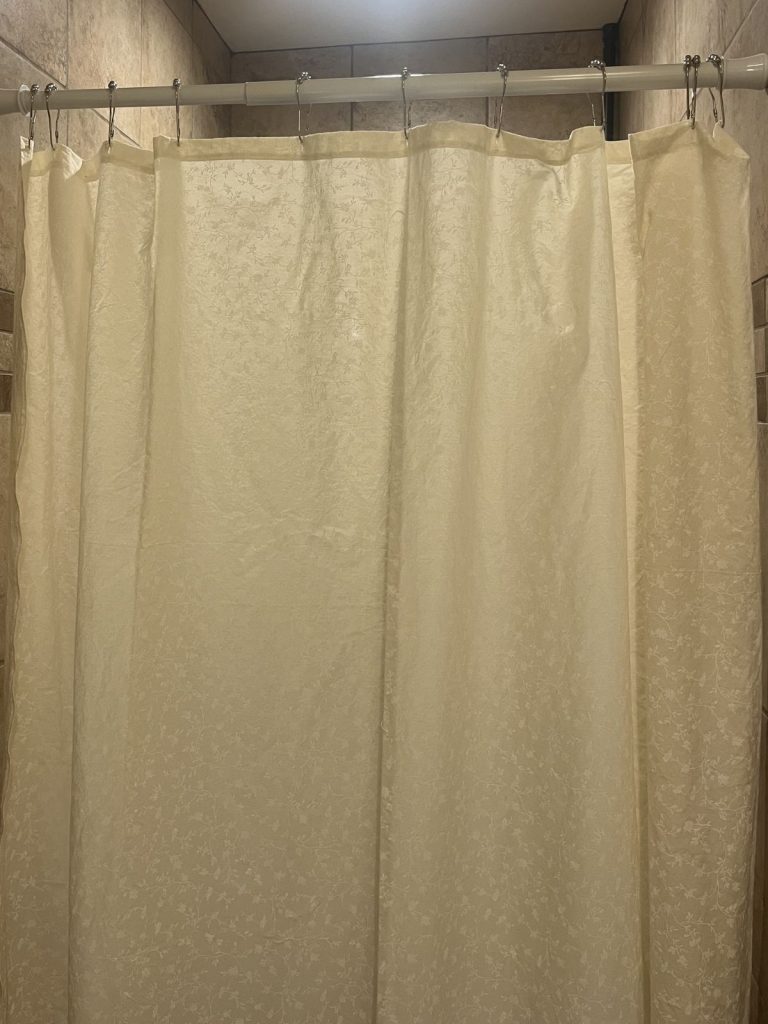
8. Hang and Enjoy
Attach your curtain rings through the buttonholes, hang your curtain, arrange it, and step back to admire your work. I love that I got to customize our own shower curtain adding charm and personality that you just can’t get from a premade shower curtain.
Save it for later…
Leave a Reply