
If you want to make a sourdough starter, but could do without the discarding, you will love my no-discard sourdough starter method!
The no-discard sourdough method is a great alternative to the typical feed and discard sourdough starter method. There are no feedings in the no-discard method. Instead, it uses an aerating technique which simply means to stir in air. There is naturally yeast in the air so when you stir the sourdough starter it brings that yeast into contact with the healthy bacteria present in the flour. Together over time while it sits out on the counter, the yeast grows and feeds on the flour releasing gas and these gas bubbles are what cause baked goods to rise. This breaks down the flour or ferments it which makes it easier to digest.
To do a no-discard sourdough starter, just water and flour as a base won’t cut it. You need something like sour milk to jump start it. This is as easy as putting out some milk to sour for 24 hours.
Making your own sourdough starter takes about 7-10 days. Although it takes a bit, it’s super easy and not hard to do. Here’s a breakdown of what you do during this time…
- Day 1 – Set the milk out
- Day 2 – Add flour
- Day 3 – 7 – Aerate and keep warm
- Day 7-10 – Aerate and watch for the gas bubbles.
Once you start to see big gas bubbles, you have a sourdough starter and start baking!
Day 1- Gather Items and Start
Here’s what you will need for this grand adventure of starting a sourdough starter!
- Clean Jar with a lid (preferably cleaned with hot soapy water or run through the dishwasher)
- Wooden Spoon
- Whole Milk
- Unbleached and unenriched flour
- 1 C Measuring Cup or a kitchen scale if you prefer less mess
After you have gathered all the things that you will need, it’s time to start the process. The first thing you will need to do is to measure out 1 C (100g) of milk into your jar, loosely cover, and set it in a warm place.
If you are using a lock lid jar, don’t lock the lid. Just shut it. It should naturally prop itself up a little leaving a little room for air flow, but that is fine.
If you are using a piece of cloth or paper towel, don’t forget to use a mason jar ring or rubber band to keep it from falling off.
Leave the milk out on your counter top or in a warm place like on your stove or in a window if it’s warm out. The warmth will help the milk to sour faster, giving your starter an extra boost in creating that natural gut healthy yeast that makes bread products rise.
Day 2 – Add Flour
Now that you have your sour milk that has sat out for a day or so, it’s time to add the flour and wait for the magic to happen.
To add the flour, measure 1C (100g) of unbleached and unenriched flour to the milk and stir with your wooden spoon. Stir until it is fully incorporated and then cover your starter back up. Again you want to place it in a warm place to give that healthy yeast a boost.
If it is summer time, this won’t be necessary but in the winter time, it can take twice as long for your starter to be ready because the yeast will grow so slowly.
Some ideal places to put your starter is…
- On or near the stove while you are cooking or baking
- On your dryer while it’s running
- In a sunny window
- In a cooled oven overnight with the light on
Check on your starter once or twice throughout the day to stir it. This aerates the starter or whips air into it which the yeast loves. After you have stirred it, make sure you cover it back up, and put it in a warm place.
The starter does not have to consistently be in a warm spot so don’t fret about it. The warmth is just an added bonus to help boost the yeast especially in the cooler months.
Preferably keep your starter in your cooled oven with the light on overnight while it is growing. The light will provide a little bit of warmth, but again, it will help it grow faster.
Day 3 – 7 – Stir and Keep Warm
Now that you have your starter going, now what?
Not much actually. Sit back and watch your starter slowly start to form lovely bubbles.
You should definitely check on it once or twice a day to stir it and maybe move it to a warm place, but for the most part of the next few days, it will do the rest of the process on its own.
You may see some lovely bubbles today or tomorrow, but your starter is not very mature yet. It is best to let it keep maturing and growing stronger for several more days. The earliest you can use your starter will probably be Day 7 or four days from now.
If that is not an ideal day for you to make some bread, no worries. Besides, it may not be ready and even if it is, it will only get stronger the more it sits (which is what you want). Putting it off for a day or two won’t do any harm to it. Just remember to stir it and it will keep maturing.
You may see your starter literally grow or rise in your jar and then it may shrink back down again. No worries! This is actually very normal.
And if you don’t see it rise, don’t worry either. This also happens.
If you happen to get a bug in it, no harm done. Just scoop it out and cover it more securely. There is no need to start over.
Day 7-10
Let’s see if your starter is ready to bake with!
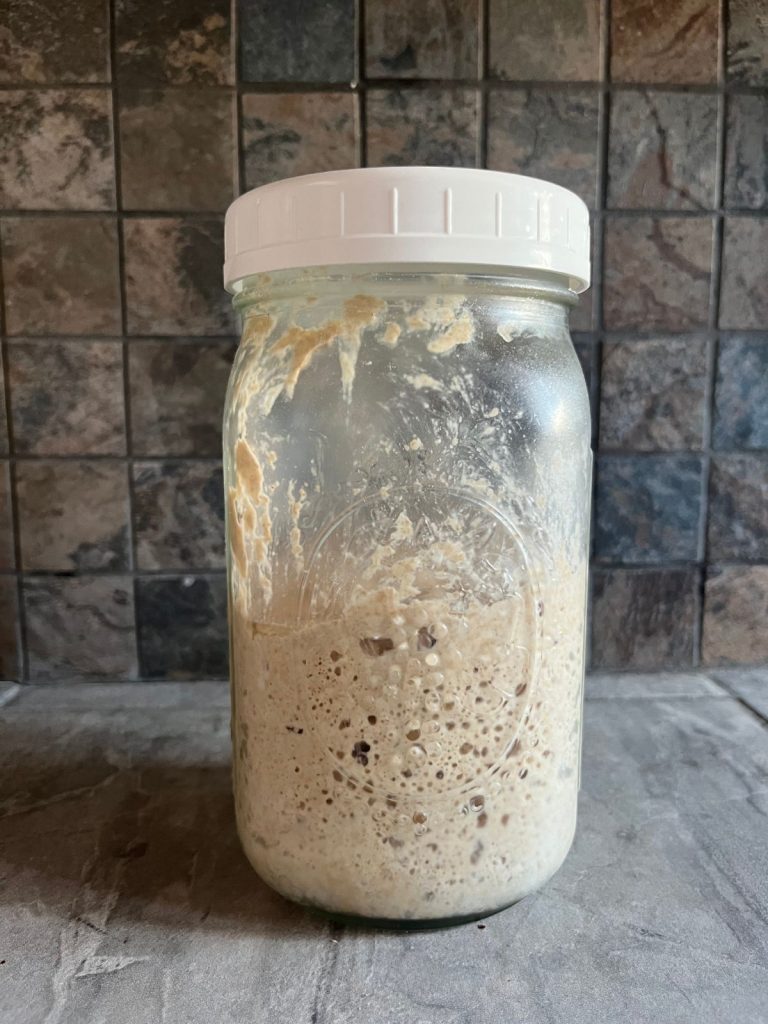
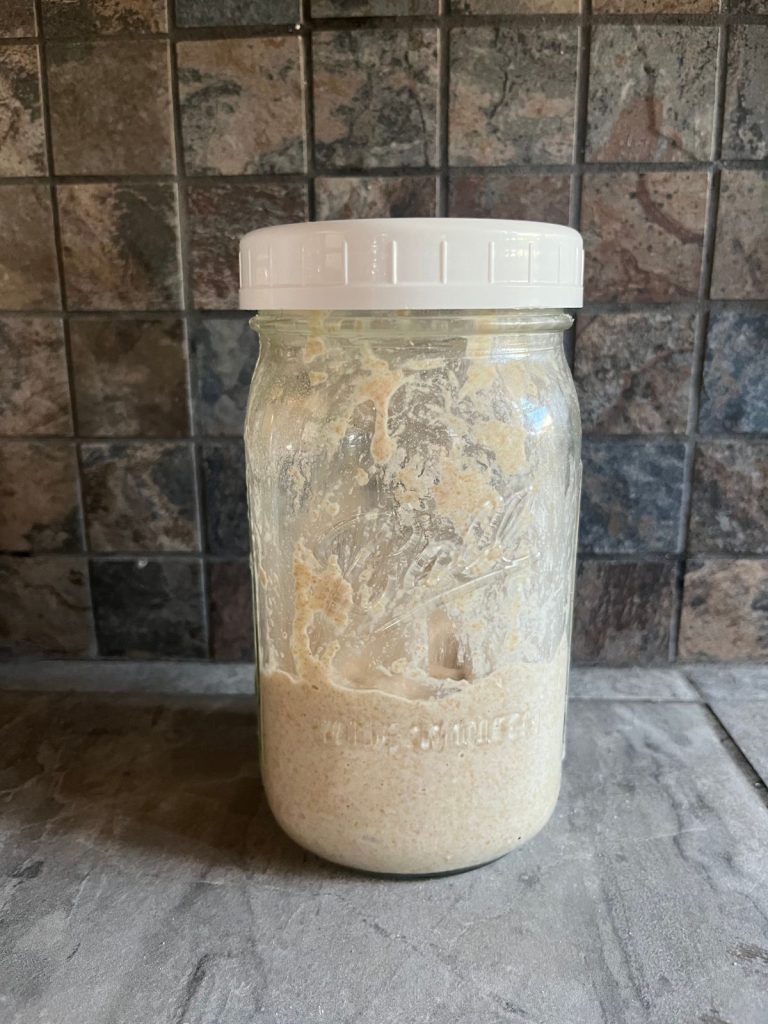
Grab your starter and see if you can see any bubbles. This is what it looks like without big bubbles.
This is what it looks like with big bubbles.
It should have lots of air holes that you can see through the glass. When you uncover it and peek in at the top it might have little bubbles that have formed around the edge.
Lots of bubbles is what you are going for.
Bubbles = Happy Starter = Fluffy Bread Products
If you don’t see very many bubbles or none at all, don’t throw it out and start again! You may need to wait a few more days.
Sometimes if the air is colder it takes longer for starters to mature. Even if this is not the case, your starter will bubble soon if you follow my method and stir it every day.
Remember, placing it in a warm place will give it a boost, too. Some of the best warm places are…
- On or near the stove while you are cooking or baking
- On your dryer while it’s running
- In a sunny window
- In a cooled oven overnight with the light on
But if your starter is nice and bubbly, then it’s time to bake!
Follow the recipe instructions closely and you should get a nice sourdough bread product!
Save it for later!
Leave a Reply